How to Disassemble Mega Drive/Genesis ROMs (or BIN files to be more exact)
By Xhojn dated Tue Nov 08 2022 10:22:39 GMT+0000 (Coordinated Universal Time) last updated Tue Nov 08 2022 12:49:33 GMT+0000 (Coordinated Universal Time)While working on my PAL conversion project for Lunar: Eternal Blue I have had to play around with disassembling some of the BIN files contained on the disk. Here's how I achieved and would also work for Mega Drive/Genesis ROMs as well.
In my previous blog post I talked about trying to alter the audio files themselves to make them match the speed for PAL territories. With the inconsistencies I encountered with my results despite doing every step the same I decided to go back to the drawing board and analyze the files themselves. Even though that can be done with a HEX editor it can be difficult (extremely) to interpret what the file actually does. Luckily for me we are several decades in the future so the internet has found a way. The Mega Drive/Genesis uses 68 K assembly which is something you very rarely see used anymore (I'm led to believe as I'm not a programmer myself) and looking at how it works I can see why as it makes no damn sense to a layman like me. Oh I understand that you're moving data into registers but when you read up on what the commands actually do mathematically...
The job at hand. For my project I'm working with a Sega CD/Mega CD game which could be disassembled itself but thanks to using [CD Mage](https://www.romhacking.net/utilities/1435/) you can delve into the game's track (on these CD games the actual game is the first track of the disc with all subsequent tracks being audio) and export the files. For Mega Drive/Genesis games there is no exporting the parts to my knowledge, you just work with the ROM itself. The next tool you're going to need is [DOSBOX-X](https://dosbox-x.com/) which is a utility that allows you to run a virtual DOS machine on your computer. It's an upgraded version of the more widely known DOSBOX with more feature including a print option which is why I picked this one. The second tool we need is the disassembler itself which is thanks to Charles Doty's [DISASM](http://emureview.ztnet.com/sega/FileBin/TechBin/sega-asm.zip) which contains both an assembler and disassembler programs. It isn't required but I found that if I want to edit any of the code than I do this in HEX form using [HxD](https://mh-nexus.de/en/hxd/); if you're looking to make big changes, this won't let you do it, but if you're looking to alter variables then HxD can let you do that.
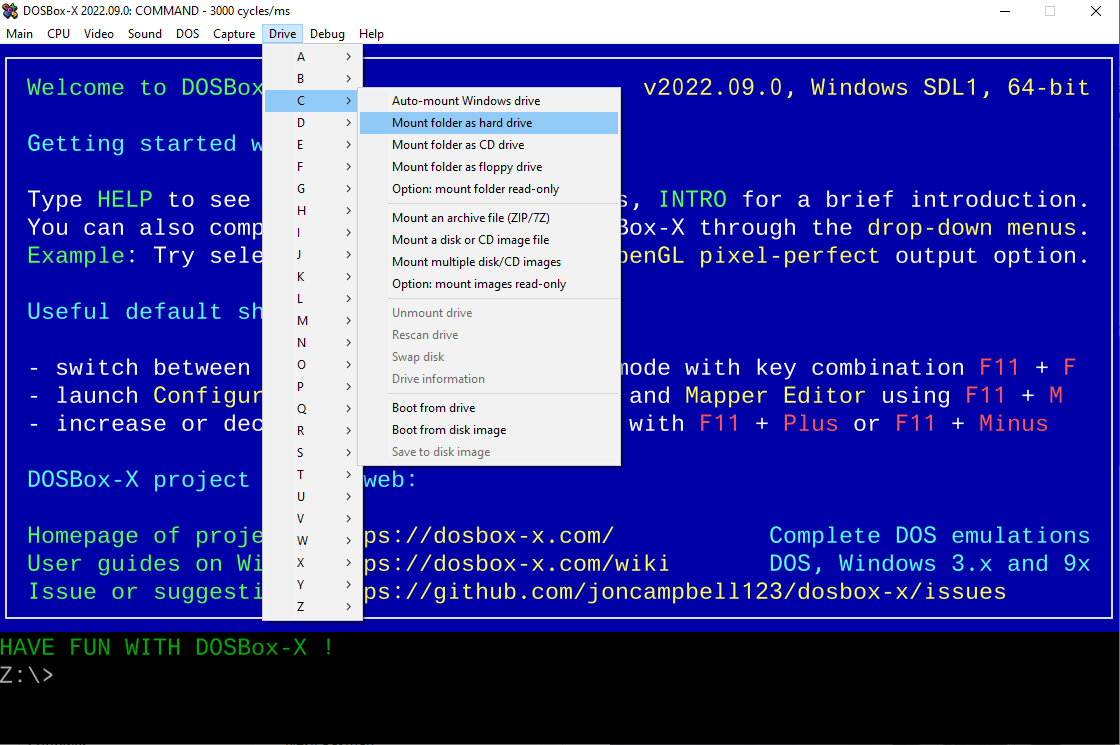
To get started we need to install DOSBOX-X. The preconfigured environment is enough for me, but you may want to make changes to suit your preferences or have certain folders be mounted every time. Next we extract the contents DISASM zip to a folder that we will be working in, I called mine Sega ASM but you just need something that you can easily remember. Lastly, we need to copy the ROMS or BIN file/files into the same folder as the DISASM files. With everything in place, we boot up DOSBOX-X, and along the top menus we pick 'Drive', pick any letter you like, and select 'Mount folder as hard drive', and select your working folder (mine was the Sega ASM that I mentioned previously).

Now we just simple have to type where the flashing cursor is next to Z:\> the drive letter you picked with a colon. For example I picked C so I just typed C: and now that folder/drive is selected.

You could just run the disassembler program with the name of the ROM/BIN (I would recommend making these shorter or one word for ease) but you would have everything outputted on DOSBOX-X. So what I like to do instead is have it print a file of the output. So an example of this is: DISASM.exe PCMDRV.BIN PRINTOUTPUT and you should hopefully get the following screen:

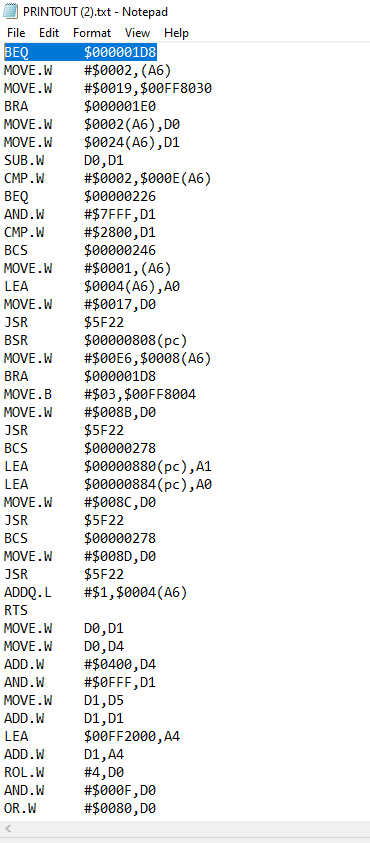
Depending on the size of the file you're disassembling this can take awhile, so you might need to leave it and come back. Once finished, check your working folder and you will now have a new file called PRINTOUT. What we need to do now is to rename it to something more sensible but also add .txt on to the end so you can open it up in notepad. Here is one I prepared earlier so you can see what it should look like:

Understanding what the code does is tricky -- what I found helped is, after each line of code, paste in what the command is doing. A list of commands plus some good explanations of assembly can be found at [this link](https://www.chibiakumas.com/68000/) but what I can tell you is that, in the second column, if you see `#$`, this is referring to a HEX value. If you want to know what the value means you can use [this online calculator to convert it for you](https://www.rapidtables.com/convert/number/hex-to-decimal.html). If you're looking to make changes, it is these values that you are likely going to want to change. The values that only have a `$` at the beginning are referencing address locations -- unless you know what you're doing, I wouldn't mess with these. You will also see a lot of `D` and `A` with numbers being referenced, these are registers, which are referenced in the guide I linked (and, again, something you shouldn't mess with unless you know what you're doing).
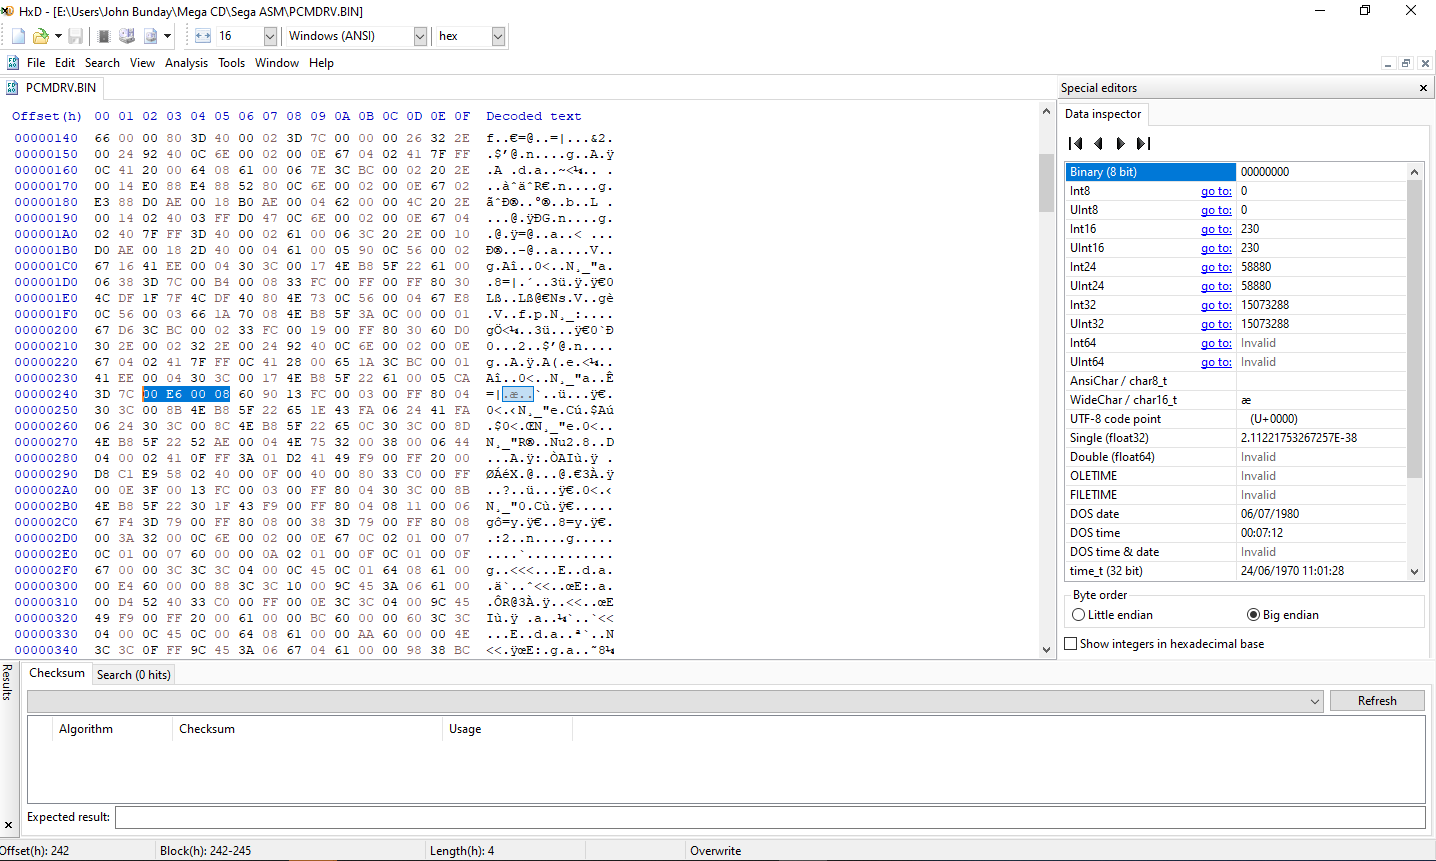
So you've found some values you would like to alter, what now? You could make the change and assemble the code again but I haven't tried that so can't speak to how well it works. What I have done instead is used HxD that I referenced earlier. If you install and open the program you can then either open or drag and drop the BIN/ROM file into HxD and you will see the file in all of it's hexadecimal glory. Using the search function, and set to look for HEX values, we can put in the one we are looking for. The smaller the digits of what you're searching for the trickier it can be as it's more likely to appear multiple times. In my example file there are lots of values like `#$00E6`; so what we have to do instead in situations like this, is look at the the values around it that are more unique. The `#`, `$` and `D`/`A` registers along with the command itself won't appear in the hex file, so `#$00E6, D0` won't help us in searching. The next value after is `$0008` so doing a search so I begin by doing a search for `00E6` and one of the results has directly after `0008`. Keep in mind, depending on what the value is representing, it may not be written in the file as the hex you're seeing in the output file. Once your change has been made, you can hit save, and HxD will make a backup file (.bak) of your original file in case you need to undo the changes.

With a Mega Drive/Genesis ROM, making the change and saving it is enough for you to then test it in your emulator of choice. With the Sega CD/Mega CD file I'm looking through, it's more of a waste of time to then reinsert the file back into the disk. It's easier to find the location in the file, as per the screenshot above, highlight a chunk of the hex values, and copy those. Then, open the original game disk BIN file in HxD, do a search on the chunk of code, and once you're in the right location, then alter the value and hit save.
Hopefully this has been helpful and happy hacking!


