Ref/beginner!
Series: "How to Code: The Fundamentals"
By AstroMacGuffin dated Wed Sep 14 2022 10:54:19 GMT+0000 (Coordinated Universal Time) last updated Wed Sep 14 2022 10:54:24 GMT+0000 (Coordinated Universal Time)This is just an easier way to find the articles, in order:
- [Lesson 0: Orientation & Absolute Basics](https://astromacguffin.com/ref/id/62ee85c9ae620ee833fd88b7)
- [Lesson 1: Control Flow, Scope, Variables, Types, & Functions](https://astromacguffin.com/ref/id/62ebac50209885383e63d856)
- [Lesson 2: Async/await, Objects & Classes](https://astromacguffin.com/ref/id/62ec1c6a209885383e63d857)
- [Lesson 3: Data Structures & Loops](https://astromacguffin.com/ref/id/62f27794719797d9d45be421)
- [Lesson 4: Checkpoint Project: Logic & Workflow Basics](https://astromacguffin.com/ref/id/6309fb281b7ad5122a6e6aea)
More to come!
Featured Article
How to Code: The Fundamentals, pt 4
By AstroMacGuffin dated Sat Aug 27 2022 11:08:24 GMT+0000 (Coordinated Universal Time) last updated Thu Sep 08 2022 11:43:14 GMT+0000 (Coordinated Universal Time)There's one major difficulty in writing this series: everything should come first. That is to say, whatever I could possibly put into lessons 2, 3, or 4, it should have been in lesson 1. The goal of this series is to write for people who are frustrated because project-based tutorials can only teach so much. You've slammed into some bugs and don't have the fundamental JavaScript knowledge to fix them. But specifically JavaScript-related knowledge isn't the end-all, be-all of coding in JavaScript. To write good code in any language, you need to grok **logic**.
But what does that mean? For programmers, logic means breaking your tasks down to tiny steps: finding where the `if` and `else` statements should go, along with the other control flow features; specifying exactly what those `if` statements will hinge on; figuring out what variables and functions you need; discovering what those functions should take as input (parameters), and give as output (return values); checking the specifics of any API's you plan to use, so that you can account for their input and output formats; and so forth.
When I was a kid, we did all this and turned it into flowcharts, but I think **pseudocode** is better. Starting with pseudocode puts you in the trenches of your project and allows you to seamlessly switch between writing code and pseudocode, inline with each other. But what's perhaps even better than pseudocode, for a beginner doing beginner projects: a plain old list.
Mastering programming logic leads to making fewer mistakes. Each mistake can easily cost you an hour or more. Let's get started.
### A Casual Approach to Logic
We won't be throwing around any fancy logic terms in this lesson. You already know logic: you just need to learn how to apply what you know. Remember, the biggest step in preparing to write code is breaking the task down into tiny bits. You've probably made a list of steps for some kind of procedure before - this is no different. In fact, before (or instead of) jumping in to pseudocode, you may find it helpful to make a simple checklist. If you do, make sure you leave plenty of vertical space between each entry on the list, so you can squeeze in more steps as you realize they're needed.
### Blasting Off Again!
Let's give you a very simple task: make an ASCII-art rocket ship blast off on an HTML page. To make the ASCII-art look like it should, we'll be using the HTML <`pre`> tag, which renders the text within using a fixed-width font. First, you need a framework for the HTML page:
```html
<!doctype html>
<html>
<head>
<title>Time to Blast Off!</title>
<style>
body { background-color: #202020; color: #dcdcdc; margin: 0; }
#launchpad { width: 100vw; height: 100vh; margin: 0; position: relative; }
div { width: 100vw; height: 100vh; margin: 0; overflow: hidden; }
</style>
<script>
document.addEventListener('DOMContentLoaded', () => {
// most of your JavaScript code will go here
} );
</script>
</head>
<body>
<div>
<pre id='launchpad'></pre>
</div>
</body>
</html>
```
You'll notice there is already a non-empty <`script`> tag in the above HTML. `document.addEventListener()` is a standard JavaScript feature that tells the browser to run a callback argument whenever the named event occurs. The callback is empty in the above template; you'll fill it in as we go. The `DOMContentLoaded` event fires when the HTML is ready to be displayed.
There's also a <`pre`> tag with the `id` **launchpad**; this is where the animation will occur. And there's a little bit of <`style`> information, to give you a dark page and light text, and to make the <`pre`> tag take up the whole browser. With these things all pre-filled, we are free to focus on developing the guts of the callback argument, which is where you'll put your JavaScript code.
#### Assembling Your Rocket
Next we need an ASCII-art rocket. I found one with a quick web search, stripped the decals off, and prepped it for launch. (Thank you to [ASCII.co.uk](https://ascii.co.uk).) You're welcome to do your own search and find one you like better, or just draw one in your favorite plain text editor.
What do I mean by "prepped it for launch?" Firstly, I turned it into an array, which means each line is quoted, and has a comma after it, and the whole thing is wrapped in square brackets. Secondly, rockets are aerodynamic things, and so there are slashes and backslashes. Backslashes are special characters in a JavaScript string; in order to say "no really, I actually just want a backslash", you have to do two of them back-to-back: `\\`; this is called "escaping" the character. There were also apostrophes in the rocket; since I used apostrophes as my quote character, those also needed to be escaped with a backslash: `\'`. This is why the rocket looks a little bit shaggy in the code. The following can go either in the callback, or above it:
```js
const rocket = [
' /\\',
' //\\\\',
' ||##||',
' //##mm\\\\',
' //##*mmm\\\\',
' //###**mmm\\\\',
' //###***nmmm\\\\',
' //####***@nmmm\\\\',
' ||####***@nnmm||',
' ||####**@@@nnm||',
' |______________|',
' | |',
' \\____________/',
' | |',
' /| /\\ |\\',
' /_| || |_\\',
' | |',
' | |',
' | |',
' /| /\\ |\\',
' / | || | \\',
' / | || | \\',
' / /\\ || /\\ \\',
' |__/ \\ || / \\__|',
' /____\\ /____\\',
' | | | |',
' | |______| |',
' | | /--\\ | |',
' |____|/----\\|____|',
' \\||/ //##\\\\ \\||/',
' /##\\//####\\\\/##\\',
' //##\\\\/####\\//##\\\\',
' ||/::\\||/##\\||/::\\||',
' \\\\\\\'\'///:**:\\\\\\\'\'///',
' \\\\\\///\\::::/\\\\\\///',
' \\\\//\\\\\\::///\\\\//',
' \\/\\\\\\\\..////\\/',
' \\\\\\\\////',
' \\\\\\///',
' \\\\//',
' \\/',
];
```
If you want to see what the rocket looks like without all the escaping, you can put the following code into the callback, save the file as `rocket.html`, open that file in your browser, and then open the Developer Tools and click the Console tab at the top:
```js
console.log(rocket.join('\n'));
```
We coded the rocket as an Array, so we use `rocket.join()` to convert it into a string, with newline characters (`\n`) between the elements.
#### From Here to There
Now, we haven't covered DOM yet in the previous lessons, and we'll be using DOM features to accomplish the blast-off. So how do I expect you to think for yourself when you don't know what to do? This is where a crucial programming skill comes in: searching for solutions to individual problems. For example, create a new tab in your browser and search for "javascript convert array to string" and you'll find the `.join()` method. If you want even better results, try searching for "mdn convert array to string" -- this will put the Mozilla Developer Network links at the top. (MDN is the definitive source for information about JavaScript.)
Now, with that in mind, create a list of steps you think will go into solving this task. Some crucial information to serve as hints:
- You have a <`pre`> inside of a <`div`>.
- The <`pre`> is already set for `relative` positioning.
- The <`div`> is set to hide anything inside it that travels or extends outside the bounds of the <`div`>.
Don't worry about how you'll accomplish the steps. Just break it down into logical steps.

After you think you've got it, compare your list to mine:
1. Move the <`pre`> down so that it's too far down to be drawn (hidden by the <`div`> and its `overflow: hidden` style rule).
2. "Draw" the rocket in the <`pre`> (put the text inside the element).
3. Move the <`pre`> gradually up, until it's too far up to be drawn (again, hidden by the <`div`>'s `overflow: hidden` style rule).
If you went into more detail, that's great. But for those of you whose list looks more or less like the above, we'll avoid spoilers and take things one step at a time.
Now take another crack at your list and try to imagine what your tasks translate to in JavaScript terms. I don't expect you to know the actual JavaScript features you'll use: I just want you to rephrase your list in more technical terms. In fact, what I really want is for you to rephrase your list in terms of web search queries.
Go ahead, and then compare your list to mine:
1. Change HTML element position
2. Change HTML element contents
3. Change HTML element position
When you think in those terms, your 3-item list just became a 2-item list plus a repeat. That makes things simpler. Now add the word "JavaScript" to your search terms and actually do the first search.
### Step 1: Positioning the Launchpad
#### Overflowing with Knowledge
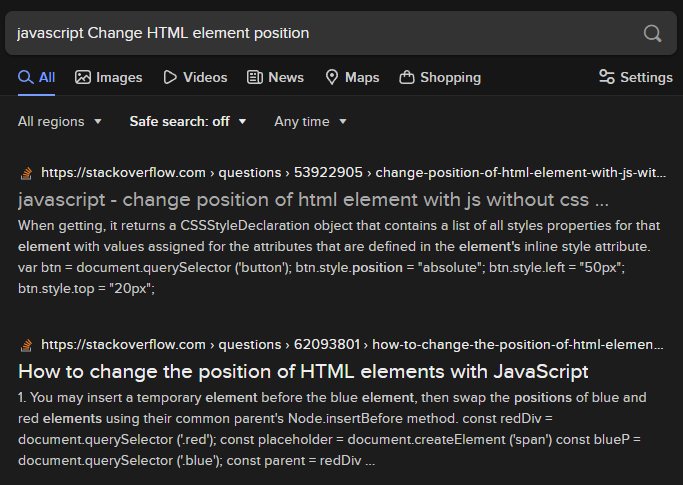
In case you've never heard of it, there's a website called StackOverflow that is easily just as valuable as MDN. StackOverflow is the internet's best Q'n'A website for nerds. When you do a search and get back links to StackOverflow with titles very similar to your search query, that usually means you're one click away from your answer. When I search for "javascript Change HTML element position", the first two results are perfect matches:
The first link has the correct answer: to move an element up and down, you get a reference to the element, and then set its `.style.top` attribute. Easy peasy, right? Except, the example code at StackOverflow has them setting the `.style.top` as a number of pixels, e.g. `123px`. That's not what we want. We don't want to figure out how many pixels tall the browser is; and we don't want our code to break on different-sized browsers. So, we're going back to the search engine for another option besides the `px` unit.
This one's a little tricky. How do you phrase the search query? We want to know what our options are when it comes to units for positioning an HTML element. But when I search for "units for positioning an HTML element" I get nothing useful. What about another approach: I'll search for "mdn alternatives to px". For that, the first result gives me an article about `length` as a CSS data type. These are CSS properties we're setting in the `.style` field, so we click the article and start reading. If you do that, you should quickly get the hint that this is where we need to be. About a third of the way down the page, we get our solution.
Instead of `px` we'll use the units `vw` and `vh`, which are percentages of the viewport width and height, respectively. That is, `1vw` equals 1% of the viewport width, and `1vh` equals 1% of the viewport height.
There's one more detail we've missed. We learned how to set the positioning of an element, but it required our code to have a reference to that element in DOM. Let's try the search "javascript get reference to element". My first search result is another StackOverflow page which gives me the knowledge that we'll be using `document.querySelector()`. But the example seems much too specific and doesn't make it clear how we'd select our <`pre`> tag. Armed with a bit more knowledge, we go back to the search engine and query for "mdn document.querySelector". This tells us that the sole parameter to that method is a `selector` which must be a valid CSS selector string. We're almost there. Search for "CSS select by ID". This time my first result is from W3Schools, which is another quality website. It's specific, and it gets to the point: the selector for a tag with `id="whatever"` is `#whatever`.
#### Committing it to Code
So now we know how to accomplish step 1 on the breakout list. We've learned:
1. We use `document.querySelector()` to get a reference to an element.
2. The selector should be `#launchpad` because that's the `id` of the <`pre`> tag.
3. Once we have that element, we set `.style.top` to change the up-and-down position of the element.
4. To move the element all the way down the page, we probably set `.style.top` to `100vh` or 100% of the viewport's height.
Now we commit what we've learned to code, and try it out. I suggest you try to write the code yourself and test it, before looking at the solution below:
```js
// capture the pre element
const el = document.querySelector('#launchpad');
// move the element below the viewport
el.style.top = '100vh';
```
Add it to your callback code, save it, and reload the browser. Open the Developer Tools and make sure you're on its "Elements" tab. Navigate the document structure until you can see the <`pre`> tag in the source. Hover your mouse over the source code for the <`pre`> tag. You will see a bubble appear in the browser's viewport, showing you that the <`pre`> is indeed below the viewport. And we don't have a scrollbar, so the element really is hidden!

Coder-space, here we come!
### Step 2: Inner Space
Rinse and repeat. Go back to the second breakout list, where we rephrased things into search terms. Copy-paste step 2 into a search engine and add "JavaScript" to the search. For me, the top result is another W3Schools page, and it has the answer: you set the element's `.innerHTML` field to replace its contents. And since I've already shown you how to convert the `rocket` Array into a string, this step is pretty much one-and-done. I'll show you again, so you don't have to scroll around and lose your place:
```js
console.log(rocket.join('\n'));
```
The `console.log()` method, of course, is how we write to the Developer Tools console; now try adapting the above into a solution for step 2 and get that rocket painted onto the <`pre`> tag. Try it yourself, and then compare to the correct solution below:
```js
// draw rocket on pre
el.innerHTML = rocket.join('\n');
```
Some of you will have done this instead:
```js
// incorrect
el.innerHTML(rocket.join('\n'));
```
...but `.innerHTML` is a field, not a method.
Let's do a reality check and see that it worked. Save, reload, and go to the Developer Tools. On the Elements tab, if you expand everything so that the <`pre`> tag's contents are shown, you'll see... a mess. The Developer Tools trims out a lot of the whitespace, so we'll just have to wait before we see whether the rocket is indeed being rendered in its full glory. We'll get there... by blasting off.
### Step 3: Countdown
Usually the countdown occurs *before* the rocket blasts off, but in our case, a countdown is *how* our rocket will blast off.
Step 3 is to *gradually* change the <`pre`> tag's position until it's up, up, and away. But how do you do things *gradually* in JavaScript? When we set `el.style.top = '100vh'` it teleported there. If we set it again for this step, won't it just teleport above the viewport, with no visible steps?
That depends on what you set `el.style.top` ***to.***
Think about it. We're doing animation. Our <`pre`> tag currently has a `top` position of `100vh`, which is what moved it 100% of the way down. The next step, logically, would be to set its `top` position to `99vh` or perhaps even `99.9vh`. To do things gradually, in JavaScript and every other language out there, we do them *a step at a time.*
Let's do this animation as smoothly as we can, and decrease the `top` field by `0.1vh` at each step. But the question remains: how do we do this in steps? I'm definitely not asking you to write a hundred, or a thousand lines of code. (Spoiler: It would actually be 2,000 lines of code, if you did it that way, but I'll explain why later.) In the previous lesson, we learned about `for` loops. Each time any loop repeats, that's equivalent to doing a step, right? The traditional `for` loop even (usually) hinges around a variable that goes up or down until it hits some limit! Yes, the `for` loop is our solution.
In the previous lesson, I demonstrated the `for` loop as follows:
```js
let something = ["truck", "train", "aeroplane"];
for (let i = 0; i < something.length; i++) {
console.log( something[i] );
}
```
That is, we were working with Arrays as both the limiter of the `for` loop, and as the subject for the loop's "payload" code. You might think we're doing that again because the `rocket` variable is an Array, but no. We just need a number to start at `100` and work its way down, `0.1` at a time.
But how far down should the number go? To `0`? If we set `el.style.top` to `0`, what do you think would happen? The top of the <`pre`> element would be `0vh` from the top of the viewport. That's not a blastoff. It's a start, but we need to go further. How much further? For a true blastoff, we need the *bottom* of the <`pre`> to be `0vh` from the top of the viewport.
Take a look at the <`style`> section above the JavaScript. The <`pre`> tag has a `height` of `100vh`. That means, if we want the *bottom* of the <`pre`> tag to be `0vh` below the top of the viewport, we need to go another `100vh`... we need a countdown that goes from `100` to `-100`.
We're 2/3rds of the way to figuring out the `for` loop itself. But in my example code above, we used the Increment Operator on the `i` variable to increase our iterator and guarantee we aren't creating an infinite loop. In the example above, `i` starts at `0` and goes up by `1` until it's equal to or greater than `something.length`. We don't want it to go up or down by a whole number, so we can't use `++` or `--`. But maybe there's an operator that does something slightly different?
Operators. There's gotta be a list, right? Try searching for "mdn javascript operators" and you'll find the answer. But wow, that's a big page. What were we trying to do? Subtract. How about we speed things along... do a find-in-page (Ctrl-F on PC) and type in "subtract". The first two results are in the sidebar: "Subtraction" and "Subtraction assignment". We can assume the "Subtraction operator", the minus sign, does what we expect it to do... but what is the Subtraction assignment operator? So we click it. The technical explanation might not be written in the clearest language, but the example code is plenty clear:
```js
let a = 2;
console.log(a -= 3);
// expected output: -1
```
This looks perfect. Instead of `i++` our iterator will be modified with the `-=` operator after each run through the loop, using `i -= 0.1`.
Go ahead and take a crack at writing the structure of the `for` loop without any code inside the curly braces. When you're done, compare it to the correct answer, below:
```js
for (let i = 100; i >= -100; i -= 0.1) {
}
```
Some of you might have done this:
```js
for (let i = 100vh; i >= -100vh; i -= 0.1) {
}
```
...but `100vh` isn't a number in JavaScript -- you'd get an error trying to run that code. And if you set `i` to `'100vh'` as a string, things would be badly broken as well. We just need the number for now -- we'll add the `vh` part in the body of the loop.
JavaScript does a thing called "type coercion" whenever you ask it to add, for example, a string and a number. It converts the number to a string and puts the two strings together. That's how you'll add the `vh` to our `i` iterator. Go ahead and take a crack at writing the one line of code that goes inside the `for` loop's body. Compare your results to the answer below:
```js
for (let i = 100; i >= -100; i -= 0.1) {
el.style.top = i + 'vh';
}
```
Don't get your hopes up... programming is a process of steps, just as surely as that loop is a process of steps.
Add it to your callback. Save it. Reload the browser.
Wait... what's wrong? You didn't see anything? Check the position of the <`pre`> tag again, by hovering over it in the Elements tab of the Developer Tools. Well, as expected, it's now above the viewport. It moved too quickly to be seen! You can confirm this by changing the `for` loop to end at `0` instead of `-100`.

So what do we do? We need a delay on these steps. Back to the search engine: "how to delay javascript code". The 2nd result is from StackOverflow and it contains the answer: `setTimeout()`. Now we search for "mdn setTimeout" for details on how it works. It's pretty simple: for input, it just needs a function to run, and a number of milliseconds to delay before running that function.
Spoiler alert: we're really, truly, almost done. Your ride to the stars awaits...
Two things are hopefully obvious at this stage:
1. The function you provide to `setTimeout()` needs only contain one line of code, the line that sets `el.style.top`.
2. The real problem here is the delay. What do we base it on?
Try and work that out yourself before reading on. Remember, a millisecond is an extremely short period of time.
#### Count-ups within Countdowns
Here's the reason the `delay` parameter is a puzzle: if you give `setTimeout()` the same `delay` argument each time through the loop, it's going to animate just as quickly as it did before, and you're not going to see anything. The only difference will be a short delay at the beginning before the `setTimeout()` callbacks start firing, one after the other, at the exact same speed as when you weren't using `setTimeout()` at all. You need to queue up the animation frames. That is to say, they need to be staggered in time; for example, they need to happen 5 milliseconds apart.
Do you think you figured it out? Give it your best try before reading on.
Here's a couple of hints: the Multiplication operator is `*`. And, here's how callback arguments are usually written, using `setTimeout()` as an example:
```js
let delay = 100;
setTimeout( () => {
// callback function body
}, delay);
// the callback is the part that looks like:
() => {
// callback function body
}
```
Do you give up? Here's the answer:
```js
let x = 1;
for (let i = 100; i >= -100; i -= 0.1) {
setTimeout( () => {
el.style.top = i + 'vh';
}, 5*x);
x++;
}
```
We needed a new variable `x` because `i` had an unsuitable number range, going into the negatives. That new variable needed to increase by one, in each step of the loop. Then the "animation frames" could be staggered apart in time: each step of the loop, we multiply `x*5` for the number of milliseconds to delay. The first frame happens at 5ms, the second frame at 10ms, etc. (You can play with that `5` to try faster and slower blastoffs.)
That's it! Save the updated JavaScript file, reload the browser, and watch your rocket fly away!

### Victory Lap: A Pseudocode Approach
What is pseudocode? It's just code comments. It's your breakout list, fleshed out even further, and turned into programming documentation. Because we write pseudocode in the actual code editor, we can write code along with it, at the same time. The best pseudocode is indented the way you expect the code to be indented.
To make sense of that, here's the completed project, as pseudocode:
```
// create rocket variable as array
// event handler: when document is ready
// reality check: output rocket to console
// capture the pre element
// move the pre below the viewport
// draw rocket on pre
// initialize delay multiplier x at 1
// loop i from 100 to -100 step -0.1
// do actual move on a delay
// do move
// stagger the moves x*5ms
// increment x
```
### Conclusion
As this series evolves, I'll periodically help you check your progress. I'll do that via a logic lesson, containing a complete mini-project, using some of the things you've learned in the preceding lessons. It's important to make projects and gain real world experience, but it's arguably more important to understand what you're doing, while you're doing it.


