Ref/what is programming!
Series: "How to Code: The Fundamentals"
By AstroMacGuffin dated Wed Sep 14 2022 10:54:19 GMT+0000 (Coordinated Universal Time) last updated Wed Sep 14 2022 10:54:24 GMT+0000 (Coordinated Universal Time)This is just an easier way to find the articles, in order:
- [Lesson 0: Orientation & Absolute Basics](https://astromacguffin.com/ref/id/62ee85c9ae620ee833fd88b7)
- [Lesson 1: Control Flow, Scope, Variables, Types, & Functions](https://astromacguffin.com/ref/id/62ebac50209885383e63d856)
- [Lesson 2: Async/await, Objects & Classes](https://astromacguffin.com/ref/id/62ec1c6a209885383e63d857)
- [Lesson 3: Data Structures & Loops](https://astromacguffin.com/ref/id/62f27794719797d9d45be421)
- [Lesson 4: Checkpoint Project: Logic & Workflow Basics](https://astromacguffin.com/ref/id/6309fb281b7ad5122a6e6aea)
More to come!
Featured Article
How to Code: The Fundamentals, pt 4
By AstroMacGuffin dated Sat Aug 27 2022 11:08:24 GMT+0000 (Coordinated Universal Time) last updated Thu Sep 08 2022 11:43:14 GMT+0000 (Coordinated Universal Time)There's one major difficulty in writing this series: everything should come first. That is to say, whatever I could possibly put into lessons 2, 3, or 4, it should have been in lesson 1. The goal of this series is to write for people who are frustrated because project-based tutorials can only teach so much. You've slammed into some bugs and don't have the fundamental JavaScript knowledge to fix them. But specifically JavaScript-related knowledge isn't the end-all, be-all of coding in JavaScript. To write good code in any language, you need to grok **logic**.
But what does that mean? For programmers, logic means breaking your tasks down to tiny steps: finding where the `if` and `else` statements should go, along with the other control flow features; specifying exactly what those `if` statements will hinge on; figuring out what variables and functions you need; discovering what those functions should take as input (parameters), and give as output (return values); checking the specifics of any API's you plan to use, so that you can account for their input and output formats; and so forth.
When I was a kid, we did all this and turned it into flowcharts, but I think **pseudocode** is better. Starting with pseudocode puts you in the trenches of your project and allows you to seamlessly switch between writing code and pseudocode, inline with each other. But what's perhaps even better than pseudocode, for a beginner doing beginner projects: a plain old list.
Mastering programming logic leads to making fewer mistakes. Each mistake can easily cost you an hour or more. Let's get started.
### A Casual Approach to Logic
We won't be throwing around any fancy logic terms in this lesson. You already know logic: you just need to learn how to apply what you know. Remember, the biggest step in preparing to write code is breaking the task down into tiny bits. You've probably made a list of steps for some kind of procedure before - this is no different. In fact, before (or instead of) jumping in to pseudocode, you may find it helpful to make a simple checklist. If you do, make sure you leave plenty of vertical space between each entry on the list, so you can squeeze in more steps as you realize they're needed.
### Blasting Off Again!
Let's give you a very simple task: make an ASCII-art rocket ship blast off on an HTML page. To make the ASCII-art look like it should, we'll be using the HTML <`pre`> tag, which renders the text within using a fixed-width font. First, you need a framework for the HTML page:
```html
<!doctype html>
<html>
<head>
<title>Time to Blast Off!</title>
<style>
body { background-color: #202020; color: #dcdcdc; margin: 0; }
#launchpad { width: 100vw; height: 100vh; margin: 0; position: relative; }
div { width: 100vw; height: 100vh; margin: 0; overflow: hidden; }
</style>
<script>
document.addEventListener('DOMContentLoaded', () => {
// most of your JavaScript code will go here
} );
</script>
</head>
<body>
<div>
<pre id='launchpad'></pre>
</div>
</body>
</html>
```
You'll notice there is already a non-empty <`script`> tag in the above HTML. `document.addEventListener()` is a standard JavaScript feature that tells the browser to run a callback argument whenever the named event occurs. The callback is empty in the above template; you'll fill it in as we go. The `DOMContentLoaded` event fires when the HTML is ready to be displayed.
There's also a <`pre`> tag with the `id` **launchpad**; this is where the animation will occur. And there's a little bit of <`style`> information, to give you a dark page and light text, and to make the <`pre`> tag take up the whole browser. With these things all pre-filled, we are free to focus on developing the guts of the callback argument, which is where you'll put your JavaScript code.
#### Assembling Your Rocket
Next we need an ASCII-art rocket. I found one with a quick web search, stripped the decals off, and prepped it for launch. (Thank you to [ASCII.co.uk](https://ascii.co.uk).) You're welcome to do your own search and find one you like better, or just draw one in your favorite plain text editor.
What do I mean by "prepped it for launch?" Firstly, I turned it into an array, which means each line is quoted, and has a comma after it, and the whole thing is wrapped in square brackets. Secondly, rockets are aerodynamic things, and so there are slashes and backslashes. Backslashes are special characters in a JavaScript string; in order to say "no really, I actually just want a backslash", you have to do two of them back-to-back: `\\`; this is called "escaping" the character. There were also apostrophes in the rocket; since I used apostrophes as my quote character, those also needed to be escaped with a backslash: `\'`. This is why the rocket looks a little bit shaggy in the code. The following can go either in the callback, or above it:
```js
const rocket = [
' /\\',
' //\\\\',
' ||##||',
' //##mm\\\\',
' //##*mmm\\\\',
' //###**mmm\\\\',
' //###***nmmm\\\\',
' //####***@nmmm\\\\',
' ||####***@nnmm||',
' ||####**@@@nnm||',
' |______________|',
' | |',
' \\____________/',
' | |',
' /| /\\ |\\',
' /_| || |_\\',
' | |',
' | |',
' | |',
' /| /\\ |\\',
' / | || | \\',
' / | || | \\',
' / /\\ || /\\ \\',
' |__/ \\ || / \\__|',
' /____\\ /____\\',
' | | | |',
' | |______| |',
' | | /--\\ | |',
' |____|/----\\|____|',
' \\||/ //##\\\\ \\||/',
' /##\\//####\\\\/##\\',
' //##\\\\/####\\//##\\\\',
' ||/::\\||/##\\||/::\\||',
' \\\\\\\'\'///:**:\\\\\\\'\'///',
' \\\\\\///\\::::/\\\\\\///',
' \\\\//\\\\\\::///\\\\//',
' \\/\\\\\\\\..////\\/',
' \\\\\\\\////',
' \\\\\\///',
' \\\\//',
' \\/',
];
```
If you want to see what the rocket looks like without all the escaping, you can put the following code into the callback, save the file as `rocket.html`, open that file in your browser, and then open the Developer Tools and click the Console tab at the top:
```js
console.log(rocket.join('\n'));
```
We coded the rocket as an Array, so we use `rocket.join()` to convert it into a string, with newline characters (`\n`) between the elements.
#### From Here to There
Now, we haven't covered DOM yet in the previous lessons, and we'll be using DOM features to accomplish the blast-off. So how do I expect you to think for yourself when you don't know what to do? This is where a crucial programming skill comes in: searching for solutions to individual problems. For example, create a new tab in your browser and search for "javascript convert array to string" and you'll find the `.join()` method. If you want even better results, try searching for "mdn convert array to string" -- this will put the Mozilla Developer Network links at the top. (MDN is the definitive source for information about JavaScript.)
Now, with that in mind, create a list of steps you think will go into solving this task. Some crucial information to serve as hints:
- You have a <`pre`> inside of a <`div`>.
- The <`pre`> is already set for `relative` positioning.
- The <`div`> is set to hide anything inside it that travels or extends outside the bounds of the <`div`>.
Don't worry about how you'll accomplish the steps. Just break it down into logical steps.

After you think you've got it, compare your list to mine:
1. Move the <`pre`> down so that it's too far down to be drawn (hidden by the <`div`> and its `overflow: hidden` style rule).
2. "Draw" the rocket in the <`pre`> (put the text inside the element).
3. Move the <`pre`> gradually up, until it's too far up to be drawn (again, hidden by the <`div`>'s `overflow: hidden` style rule).
If you went into more detail, that's great. But for those of you whose list looks more or less like the above, we'll avoid spoilers and take things one step at a time.
Now take another crack at your list and try to imagine what your tasks translate to in JavaScript terms. I don't expect you to know the actual JavaScript features you'll use: I just want you to rephrase your list in more technical terms. In fact, what I really want is for you to rephrase your list in terms of web search queries.
Go ahead, and then compare your list to mine:
1. Change HTML element position
2. Change HTML element contents
3. Change HTML element position
When you think in those terms, your 3-item list just became a 2-item list plus a repeat. That makes things simpler. Now add the word "JavaScript" to your search terms and actually do the first search.
### Step 1: Positioning the Launchpad
#### Overflowing with Knowledge
In case you've never heard of it, there's a website called StackOverflow that is easily just as valuable as MDN. StackOverflow is the internet's best Q'n'A website for nerds. When you do a search and get back links to StackOverflow with titles very similar to your search query, that usually means you're one click away from your answer. When I search for "javascript Change HTML element position", the first two results are perfect matches:
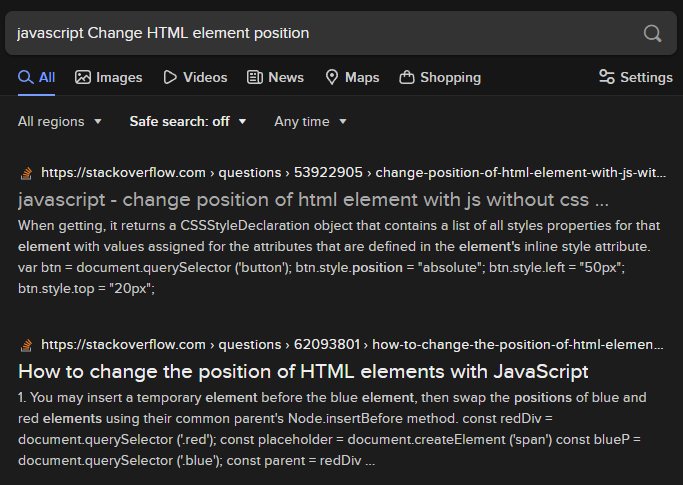
The first link has the correct answer: to move an element up and down, you get a reference to the element, and then set its `.style.top` attribute. Easy peasy, right? Except, the example code at StackOverflow has them setting the `.style.top` as a number of pixels, e.g. `123px`. That's not what we want. We don't want to figure out how many pixels tall the browser is; and we don't want our code to break on different-sized browsers. So, we're going back to the search engine for another option besides the `px` unit.
This one's a little tricky. How do you phrase the search query? We want to know what our options are when it comes to units for positioning an HTML element. But when I search for "units for positioning an HTML element" I get nothing useful. What about another approach: I'll search for "mdn alternatives to px". For that, the first result gives me an article about `length` as a CSS data type. These are CSS properties we're setting in the `.style` field, so we click the article and start reading. If you do that, you should quickly get the hint that this is where we need to be. About a third of the way down the page, we get our solution.
Instead of `px` we'll use the units `vw` and `vh`, which are percentages of the viewport width and height, respectively. That is, `1vw` equals 1% of the viewport width, and `1vh` equals 1% of the viewport height.
There's one more detail we've missed. We learned how to set the positioning of an element, but it required our code to have a reference to that element in DOM. Let's try the search "javascript get reference to element". My first search result is another StackOverflow page which gives me the knowledge that we'll be using `document.querySelector()`. But the example seems much too specific and doesn't make it clear how we'd select our <`pre`> tag. Armed with a bit more knowledge, we go back to the search engine and query for "mdn document.querySelector". This tells us that the sole parameter to that method is a `selector` which must be a valid CSS selector string. We're almost there. Search for "CSS select by ID". This time my first result is from W3Schools, which is another quality website. It's specific, and it gets to the point: the selector for a tag with `id="whatever"` is `#whatever`.
#### Committing it to Code
So now we know how to accomplish step 1 on the breakout list. We've learned:
1. We use `document.querySelector()` to get a reference to an element.
2. The selector should be `#launchpad` because that's the `id` of the <`pre`> tag.
3. Once we have that element, we set `.style.top` to change the up-and-down position of the element.
4. To move the element all the way down the page, we probably set `.style.top` to `100vh` or 100% of the viewport's height.
Now we commit what we've learned to code, and try it out. I suggest you try to write the code yourself and test it, before looking at the solution below:
```js
// capture the pre element
const el = document.querySelector('#launchpad');
// move the element below the viewport
el.style.top = '100vh';
```
Add it to your callback code, save it, and reload the browser. Open the Developer Tools and make sure you're on its "Elements" tab. Navigate the document structure until you can see the <`pre`> tag in the source. Hover your mouse over the source code for the <`pre`> tag. You will see a bubble appear in the browser's viewport, showing you that the <`pre`> is indeed below the viewport. And we don't have a scrollbar, so the element really is hidden!

Coder-space, here we come!
### Step 2: Inner Space
Rinse and repeat. Go back to the second breakout list, where we rephrased things into search terms. Copy-paste step 2 into a search engine and add "JavaScript" to the search. For me, the top result is another W3Schools page, and it has the answer: you set the element's `.innerHTML` field to replace its contents. And since I've already shown you how to convert the `rocket` Array into a string, this step is pretty much one-and-done. I'll show you again, so you don't have to scroll around and lose your place:
```js
console.log(rocket.join('\n'));
```
The `console.log()` method, of course, is how we write to the Developer Tools console; now try adapting the above into a solution for step 2 and get that rocket painted onto the <`pre`> tag. Try it yourself, and then compare to the correct solution below:
```js
// draw rocket on pre
el.innerHTML = rocket.join('\n');
```
Some of you will have done this instead:
```js
// incorrect
el.innerHTML(rocket.join('\n'));
```
...but `.innerHTML` is a field, not a method.
Let's do a reality check and see that it worked. Save, reload, and go to the Developer Tools. On the Elements tab, if you expand everything so that the <`pre`> tag's contents are shown, you'll see... a mess. The Developer Tools trims out a lot of the whitespace, so we'll just have to wait before we see whether the rocket is indeed being rendered in its full glory. We'll get there... by blasting off.
### Step 3: Countdown
Usually the countdown occurs *before* the rocket blasts off, but in our case, a countdown is *how* our rocket will blast off.
Step 3 is to *gradually* change the <`pre`> tag's position until it's up, up, and away. But how do you do things *gradually* in JavaScript? When we set `el.style.top = '100vh'` it teleported there. If we set it again for this step, won't it just teleport above the viewport, with no visible steps?
That depends on what you set `el.style.top` ***to.***
Think about it. We're doing animation. Our <`pre`> tag currently has a `top` position of `100vh`, which is what moved it 100% of the way down. The next step, logically, would be to set its `top` position to `99vh` or perhaps even `99.9vh`. To do things gradually, in JavaScript and every other language out there, we do them *a step at a time.*
Let's do this animation as smoothly as we can, and decrease the `top` field by `0.1vh` at each step. But the question remains: how do we do this in steps? I'm definitely not asking you to write a hundred, or a thousand lines of code. (Spoiler: It would actually be 2,000 lines of code, if you did it that way, but I'll explain why later.) In the previous lesson, we learned about `for` loops. Each time any loop repeats, that's equivalent to doing a step, right? The traditional `for` loop even (usually) hinges around a variable that goes up or down until it hits some limit! Yes, the `for` loop is our solution.
In the previous lesson, I demonstrated the `for` loop as follows:
```js
let something = ["truck", "train", "aeroplane"];
for (let i = 0; i < something.length; i++) {
console.log( something[i] );
}
```
That is, we were working with Arrays as both the limiter of the `for` loop, and as the subject for the loop's "payload" code. You might think we're doing that again because the `rocket` variable is an Array, but no. We just need a number to start at `100` and work its way down, `0.1` at a time.
But how far down should the number go? To `0`? If we set `el.style.top` to `0`, what do you think would happen? The top of the <`pre`> element would be `0vh` from the top of the viewport. That's not a blastoff. It's a start, but we need to go further. How much further? For a true blastoff, we need the *bottom* of the <`pre`> to be `0vh` from the top of the viewport.
Take a look at the <`style`> section above the JavaScript. The <`pre`> tag has a `height` of `100vh`. That means, if we want the *bottom* of the <`pre`> tag to be `0vh` below the top of the viewport, we need to go another `100vh`... we need a countdown that goes from `100` to `-100`.
We're 2/3rds of the way to figuring out the `for` loop itself. But in my example code above, we used the Increment Operator on the `i` variable to increase our iterator and guarantee we aren't creating an infinite loop. In the example above, `i` starts at `0` and goes up by `1` until it's equal to or greater than `something.length`. We don't want it to go up or down by a whole number, so we can't use `++` or `--`. But maybe there's an operator that does something slightly different?
Operators. There's gotta be a list, right? Try searching for "mdn javascript operators" and you'll find the answer. But wow, that's a big page. What were we trying to do? Subtract. How about we speed things along... do a find-in-page (Ctrl-F on PC) and type in "subtract". The first two results are in the sidebar: "Subtraction" and "Subtraction assignment". We can assume the "Subtraction operator", the minus sign, does what we expect it to do... but what is the Subtraction assignment operator? So we click it. The technical explanation might not be written in the clearest language, but the example code is plenty clear:
```js
let a = 2;
console.log(a -= 3);
// expected output: -1
```
This looks perfect. Instead of `i++` our iterator will be modified with the `-=` operator after each run through the loop, using `i -= 0.1`.
Go ahead and take a crack at writing the structure of the `for` loop without any code inside the curly braces. When you're done, compare it to the correct answer, below:
```js
for (let i = 100; i >= -100; i -= 0.1) {
}
```
Some of you might have done this:
```js
for (let i = 100vh; i >= -100vh; i -= 0.1) {
}
```
...but `100vh` isn't a number in JavaScript -- you'd get an error trying to run that code. And if you set `i` to `'100vh'` as a string, things would be badly broken as well. We just need the number for now -- we'll add the `vh` part in the body of the loop.
JavaScript does a thing called "type coercion" whenever you ask it to add, for example, a string and a number. It converts the number to a string and puts the two strings together. That's how you'll add the `vh` to our `i` iterator. Go ahead and take a crack at writing the one line of code that goes inside the `for` loop's body. Compare your results to the answer below:
```js
for (let i = 100; i >= -100; i -= 0.1) {
el.style.top = i + 'vh';
}
```
Don't get your hopes up... programming is a process of steps, just as surely as that loop is a process of steps.
Add it to your callback. Save it. Reload the browser.
Wait... what's wrong? You didn't see anything? Check the position of the <`pre`> tag again, by hovering over it in the Elements tab of the Developer Tools. Well, as expected, it's now above the viewport. It moved too quickly to be seen! You can confirm this by changing the `for` loop to end at `0` instead of `-100`.

So what do we do? We need a delay on these steps. Back to the search engine: "how to delay javascript code". The 2nd result is from StackOverflow and it contains the answer: `setTimeout()`. Now we search for "mdn setTimeout" for details on how it works. It's pretty simple: for input, it just needs a function to run, and a number of milliseconds to delay before running that function.
Spoiler alert: we're really, truly, almost done. Your ride to the stars awaits...
Two things are hopefully obvious at this stage:
1. The function you provide to `setTimeout()` needs only contain one line of code, the line that sets `el.style.top`.
2. The real problem here is the delay. What do we base it on?
Try and work that out yourself before reading on. Remember, a millisecond is an extremely short period of time.
#### Count-ups within Countdowns
Here's the reason the `delay` parameter is a puzzle: if you give `setTimeout()` the same `delay` argument each time through the loop, it's going to animate just as quickly as it did before, and you're not going to see anything. The only difference will be a short delay at the beginning before the `setTimeout()` callbacks start firing, one after the other, at the exact same speed as when you weren't using `setTimeout()` at all. You need to queue up the animation frames. That is to say, they need to be staggered in time; for example, they need to happen 5 milliseconds apart.
Do you think you figured it out? Give it your best try before reading on.
Here's a couple of hints: the Multiplication operator is `*`. And, here's how callback arguments are usually written, using `setTimeout()` as an example:
```js
let delay = 100;
setTimeout( () => {
// callback function body
}, delay);
// the callback is the part that looks like:
() => {
// callback function body
}
```
Do you give up? Here's the answer:
```js
let x = 1;
for (let i = 100; i >= -100; i -= 0.1) {
setTimeout( () => {
el.style.top = i + 'vh';
}, 5*x);
x++;
}
```
We needed a new variable `x` because `i` had an unsuitable number range, going into the negatives. That new variable needed to increase by one, in each step of the loop. Then the "animation frames" could be staggered apart in time: each step of the loop, we multiply `x*5` for the number of milliseconds to delay. The first frame happens at 5ms, the second frame at 10ms, etc. (You can play with that `5` to try faster and slower blastoffs.)
That's it! Save the updated JavaScript file, reload the browser, and watch your rocket fly away!

### Victory Lap: A Pseudocode Approach
What is pseudocode? It's just code comments. It's your breakout list, fleshed out even further, and turned into programming documentation. Because we write pseudocode in the actual code editor, we can write code along with it, at the same time. The best pseudocode is indented the way you expect the code to be indented.
To make sense of that, here's the completed project, as pseudocode:
```
// create rocket variable as array
// event handler: when document is ready
// reality check: output rocket to console
// capture the pre element
// move the pre below the viewport
// draw rocket on pre
// initialize delay multiplier x at 1
// loop i from 100 to -100 step -0.1
// do actual move on a delay
// do move
// stagger the moves x*5ms
// increment x
```
### Conclusion
As this series evolves, I'll periodically help you check your progress. I'll do that via a logic lesson, containing a complete mini-project, using some of the things you've learned in the preceding lessons. It's important to make projects and gain real world experience, but it's arguably more important to understand what you're doing, while you're doing it.
Featured Article
How to Code: The Fundamentals, pt 3
By AstroMacGuffin dated Tue Aug 09 2022 15:04:52 GMT+0000 (Coordinated Universal Time) last updated Thu Aug 11 2022 20:50:30 GMT+0000 (Coordinated Universal Time) In part 2 we dealt with `async`/`await`, objects and classes. In part 3, we're getting into Arrays and a little further into objects, plus we're taking another bite of control flow. These unrelated topics are closely linked in actual use.
In this lesson, we'll cover:
- arrays
- how to find your way around objects and arrays
- data type methods & built-in objects
- comparison operators
- `for` loops and the `Array.forEach` method
- the Increment (`++`) and Decrement (`--`) operators
- `while` loops
### Data Type Methods & Built-in Objects
On a certain level, everything in JavaScript is an object. Your string variables have object methods, and even a hard-coded string has those same methods. The same is true of numbers, Arrays, and, of course, all the built-in objects you can access just by virtue of the fact that you're writing JavaScript code.
For example, Arrays have the `.join()` method which turns the Array into a string; and strings have the `.split()` method which turns the string into an Array.
And complementing those methods attached to the individual String, Number, and Array "objects" in your code, there are the Standard Built-in Objects. These objects' classes have methods that are sometimes uniquely useful, like `Array.isArray()` or `Object.keys()`.
Of course MDN has a [full list](https://developer.mozilla.org/en-US/docs/Web/JavaScript/Reference/Global_Objects) of all the built-ins, but it's probably more useful if I hand-pick a few: [Object](https://developer.mozilla.org/en-US/docs/Web/JavaScript/Reference/Global_Objects/Object), [Number](https://developer.mozilla.org/en-US/docs/Web/JavaScript/Reference/Global_Objects/Number), [Math](https://developer.mozilla.org/en-US/docs/Web/JavaScript/Reference/Global_Objects/Math), [Date](https://developer.mozilla.org/en-US/docs/Web/JavaScript/Reference/Global_Objects/Date), [String](https://developer.mozilla.org/en-US/docs/Web/JavaScript/Reference/Global_Objects/String), [RegExp](https://developer.mozilla.org/en-US/docs/Web/JavaScript/Reference/Global_Objects/RegExp), [Array](https://developer.mozilla.org/en-US/docs/Web/JavaScript/Reference/Global_Objects/Array), [JSON](https://developer.mozilla.org/en-US/docs/Web/JavaScript/Reference/Global_Objects/JSON), and [Promise](https://developer.mozilla.org/en-US/docs/Web/JavaScript/Reference/Global_Objects/Promise) are the ones I use the most.
### Arrays
If a variable is a box, then an Array is a box full of boxes. The internal boxes are numbered, starting with #0 for the first box. Those boxes can also be subdivided into boxes, as many layers deep as you need.
The following code sample contains a smattering of things you need to know about Arrays:
```js
let arr = []; // create an empty array
arr[0] = 'Arrays'; // set the 1st element
arr.push('rule'); // add an element at the end
console.log( arr[1] ); // output the 2nd element
if (arr.indexOf('rule') > -1) { /* do something if 'rule' appears in array */ }
let str = arr.join(' '); // make string with spaces between elements
```
#### Finding Your Way Around Arrays
Arrays never use dot notation -- they only use square brackets. Since you can have arrays within arrays, and objects within arrays, let's go into some example cases.
```js
const arrayOfObjects = [
// element 0: an object with info for the 1st Doctor
{ doctor: '1st', actor: 'Hartnell' },
// element 1: an object with info for the 9th Doctor
{ doctor: '9th', actor: 'Eccleston'}
];
console.log( arrayOfObjects[0].actor );
// outputs 'Hartnell'
```
Array element position numbers start at 0 and increment by 1 from there. So, `arrayOfObjects[0]` addresses the first element of `arrayOfObjects`. The first element of `arrayOfObjects` is an object, so we can address one of its fields by adding `.actor`.
Next, let's look at an array of arrays, aka a "multi-dimensional array".
```js
const arrayOfArrays = [
// element 0: an array of dark colors
['navy blue', 'forest green', 'dark grey', 'black'],
// element 1: an array of light colors
['sky blue', 'bright green', 'light grey', 'white']
];
console.log( arrayOfArrays[1][3] );
// outputs 'white'
```
Arrays can contain arrays that hold arrays *full* of arrays, on and on, with more and more dimensions of data complexity.
Later in this lesson, you'll see how to step through arrays using two types of loops designed specifically for that job. There are a lot more than two, though!

#### Array Methods
There are many other methods automatically attached to every Array object you create in your code. MDN has a [comprehensive guide](https://developer.mozilla.org/en-US/docs/Web/JavaScript/Reference/Global_Objects/Array), of course. To get you started, here are a few key Array methods.
##### `.indexOf()` and Other Search Methods
Assume you have an Array called `arr` and you want to know if something is in that Array, or even want to know *where* it is in that Array. The code `arr.indexOf(thing)` returns the index of `thing` in Array `arr`. When you're using `.indexOf` simply to test whether the `thing` is in the Array, remember, Arrays start at index 0, meaning a 0 is a hit. So in a conditional like that, think like this:
- **-1** is false (the `thing` is **not** in the Array),
- **greater than -1** is true (the `thing` **is** in the Array).
```js
let arr = ['Arrays', 'rule'];
if ( arr.indexOf('rule') > -1 ) {
// index greater than -1 = hit
}
```
There's also `.find()` which lets you specify a testing function. `.find()` returns the first Array entry that makes your testing function `return true`.
```js
let arr = ['Arrays', 'rule'];
let match = arr.find( /* begin testing function */ (item) => {
// testing function code
return item.startsWith('Array');
} );
console.log( match ); // outputs "Arrays"
```
The Array method `.lastIndexOf()` is just like `.indexOf()` but it starts its search at the end of the Array and steps backwards until it finds a match. It returns -1 if no match was found, or if a match was found it returns the index of the found match.
##### `.push()` and Other Insertion Methods
The `.push()` method inserts one or more new elements at the end of the Array.
```js
const arr = ['Arrays', 'rule'];
arr.push('and');
arr.push('objects', 'do', 'too'); // add multiple
console.log( arr.length ); // outputs "6"
```
The `.unshift()` method adds one or more new elements at the beginning of the Array.
```js
const arr = ['Eccleston', 'Tennant', 'Smith', 'Capaldi', 'Whittaker'];
arr.unshift(
'Hartnell', 'Troughton', 'Pertwee', 'Baker',
'Davison', 'Baker', 'McCoy', 'McGann'
);
console.log( arr );
/* output:
[
'Hartnell', 'Troughton', 'Pertwee', 'Baker', 'Davison', 'Baker', 'McCoy',
'McGann', 'Eccleston', 'Tennant', 'Smith', 'Capaldi', 'Whittaker'
]
*/
```
Finally the `.splice()` method. This method is versatile: it deletes, it inserts, it'll chop off half the array or more... all depending on how you use it. For insertion at some arbitrary point in the Array, you need the index for the new entry (or entries). Anything currently at that position or later, will be bumped. Let's say you have the index in the variable `index`... you would do:
```js
const arr = ['apple', 'banana', 'grape'];
// let's suppose a variable index === 2
arr.splice(index, 0, 'canteloupe', 'dragonfruit');
console.log( arr );
// outputs:
// [ 'apple', 'banana', 'canteloupe', 'dragonfruit', 'grape' ]
```
That second argument to `.splice()`, which is set to 0 above, is the number of elements you want to delete at that position. So you can replace, insert, do a mass delete and an insert at the same time, etc. You can also do deletions *without insertions* using `.splice()`, because the list of new entries is an optional parameter. And, you can chop off every element after `index` using `.splice()`, by leaving off the second parameter.
##### `.join()` and Other Misc Methods
The `.join()` method turns an Array into a string, using a string as a linker between elements. Example:
```js
const arr = ['Arrays', 'rule', 'and', 'so', 'do', 'objects'];
console.log( arr.join(' ') );
// outputs "Arrays rule and so do objects"
```
The `Array.isArray()` static class method is how we deal with the fact that the following code outputs the string, "object":
```js
let x = [1, 2, 3, 4, 5];
console.log( typeof x );
// outputs: "object"
```
(`typeof` will be covered later this lesson; for now just understand it outputs a string, equal to the category of whatever's to the right of the word `typeof`.)
So we can't use `typeof` to find out if something is an Array. We have to use `Array.isArray()`. It's not `theVariable.isArray()`, it's `Array.isArray(theVariable)`, because this is a static class method rather than an object method.
The `.map()` method creates a new Array whose elements are generated by a callback function. You provide the callback function, which is run once per element in the Array. The callback function automatically receives inputs so long as you set the function signature to receive them. The usual signature is either `(item)` which gives you the element (each one, one iteration at a time), or `(item, index)` which gives you the element plus its index in the Array.
```js
const arr = [1, 2, 3, 4, 5];
const a = arr.map( (item) => {
return item*5;
});
console.log( a );
// output: [ 5, 10, 15, 20, 25 ]
```
The `.filter()` method copies a portion of an Array. You provide a function as the first (and usually only) argument to `.filter()`. This function gets run once for every element in the Array. The function receives input automatically, you just have to set your signature to handle those inputs. The two most commonly used signatures are `(item, index)` where `item` is the element and `index` is its index; or `(item)` -- same as before, minus the index.
```js
const arr = [1, 2, 3, 4, 5];
const a = arr.filter( (item, index) => {
if (index > 0 && index < 4) return true;
else return false;
});
console.log( a );
a[0] = ' Swiss';
console.log( arr );
```
Interestingly, the above script didn't perform the same exact way across JavaScript implementations. For one thing, the documentation for `.filter()` says the copy remains linked to the source Array, and therefore changing an element in one Array, should change the other; but the two Arrays were independent in both Node.js and Opera Browser (which is a fork of Chrome, under the hood). Also, my browser assigned `a[0]` the value of `"Swiss"` before outputting the content of `a`; that is, the `console.log()` method was somehow delayed, but only in the browser. I have no explanation for this quirk and my only advice is, test often.
#### Moving On
Arrays do a lot more than what I've demonstrated here (we'll cover one more Array method later this lesson). Always remember you can learn more reading the [MDN reference for Arrays](https://developer.mozilla.org/en-US/docs/Web/JavaScript/Reference/Global_Objects/Array), just as soon as you get comfortable reading its more technical format.

### How to Find your Way around Objects
Just like with Arrays, it's all fantastic that an object can hold multiple values, but that does nothing for you if you don't know how to access the data inside.
#### Objects & Sub-Objects
Let's say you have an object like this:
```js
const fruitColor = {
banana: "yellow",
apple: "red",
pear: "green",
}
```
I think we all know by now that this will output `red`:
```js
console.log( fruitColor.apple );
```
You can continue chaining dots and field names so long as necessary to address nested objects:
```js
const fruitColor = {
banana: "yellow",
apple: { fuji: "red", grannySmith: "green" },
pear: "green",
}
```
To output `red` from the above data, we now:
```js
console.log( fruitColor.apple.fuji );
```
#### Finding Object Properties Using Variables
But what if the choice of fruit was unknown until runtime? What if you needed to use a variable to select into the `fruitColor` object, to identify which property you want? There is an alternate syntax for that:
```js
let whichFruit = 'banana';
console.log( fruitColor[whichFruit] );
```
Since `apple` was broken down to `fuji` and `grannySmith` in a sub-object, dynamic addressing gets a little more involved. If we want to output `red` from that data:
```js
let whichFruit = 'apple';
let whichType = 'fuji';
if (whichType)
console.log( fruitColor[whichFruit][whichType] );
else
console.log( fruitColor[whichFruit] );
```
You can mix and match dot notation vs square brackets as needed. For example, these are both the same thing:
```js
console.log( fruitColor.apple['fuji'] ); // red
console.log( fruitColor['apple'].fuji ); // red
```
But this doesn't work:
```js
console.log( fruitColor["apple.fuji"] ); // undefined
```
***By the way,*** you might notice I left off the curly braces on the `if`/`else` above. Any control flow feature that involves curly braces (so, almost all of them) can be done without the curly braces -- in which case, only one statement will happen (or not happen) as a result of that control flow feature. This is illustrated in the example code above: both the `if` and the `else` each have only one line indented under them. (That indentation is only to remind the programmer about the *scope* of each block (or line) of code -- indentation isn't a flow control feature in JavaScript.)
#### A Peek Ahead
Finally, looping through objects. We're getting ahead a bit, but we'll come back to it later this lesson. You use the `Object.keys()` method to get an Array of the keys, and then you loop through that Array, using the values you find along the way to select into the object. Like this:
```js
const obj = {
ball: "round",
seeSaw: "flat",
truck: "complex"
};
const keys = Object.keys( obj );
keys.forEach( (item) => {
console.log( obj[item] );
});
/* output:
round
flat
complex
*/
```
### Comparison Operators & Other Related Operators
So far we've only discussed one of the "comparison operators" -- that being `===` the Strict Equality operator. But there are many operators you can use to make a conditional:
<table>
<tr><th>Operator</th><th>Effect</th><th>Example</th></tr>
<tr><td style="padding: 4px 20px 0 0"><code>===</code></td><td style="padding: 4px 20px 0 0">returns true if values are equal and of equal type</td>
<td style="padding: 4px 0 0 0"><code>if (x === y)</code></td></tr>
<tr><td style="padding: 4px 20px 0 0"><code>==</code></td><td style="padding: 4px 20px 0 0">returns true if values are equal after type conversion</td>
<td style="padding: 4px 0 0 0"><code>if (x == y)</code></td></tr>
<tr><td style="padding: 4px 20px 0 0"><code><</code></td><td style="padding: 4px 20px 0 0">returns true if number to left is smaller than number to right;<br/>or if string to left comes alphabetically earlier than the string on the right</td>
<td style="padding: 4px 0 0 0"><code>if (x < y)</code></td></tr>
<tr><td style="padding: 4px 20px 0 0"><code>></code></td><td style="padding: 4px 20px 0 0">returns true if number to left is larger than number to right;<br/>or if string to left comes alphabetically after the string on the right</td>
<td style="padding: 4px 0 0 0"><code>if (x > y)</code></td></tr>
<tr><td style="padding: 4px 20px 0 0"><code><=</code></td><td style="padding: 4px 20px 0 0">returns true if value to left of operator is less than or equal to the value on the right</td>
<td style="padding: 4px 0 0 0"><code>if (x <= y)</code></td></tr>
<tr><td style="padding: 4px 20px 0 0"><code>>=</code></td><td style="padding: 4px 20px 0 0">returns true if value to the left is greater than or equal to the value on the right</td>
<td style="padding: 4px 0 0 0"><code>if (x >= y)</code></td></tr>
<tr><td style="padding: 4px 20px 0 0"><code>!==</code></td><td style="padding: 4px 20px 0 0">returns true if the two values are not equal or don't have equal type</td>
<td style="padding: 4px 0 0 0"><code>if (x !== y)</code></td></tr>
<tr><td style="padding: 4px 20px 0 0"><code>!=</code></td><td style="padding: 4px 20px 0 0">returns true if the two values are not equal after type conversion</td>
<td style="padding: 4px 0 0 0"><code>if (x != y)</code></td></tr>
<tr><td style="padding: 4px 20px 0 0"><code>in</code></td><td style="padding: 4px 20px 0 0">returns true if the string on the left of the operator is a key in the object to the right of the operator</td>
<td style="padding: 4px 0 0 0"><code>if ("message" in error)</code></td></tr>
<tr><td style="padding: 4px 20px 0 0"><code>typeof</code></td><td style="padding: 4px 20px 0 0">returns a string describing the type of the variable after the operator</td>
<td style="padding: 4px 0 0 0"><code>if (typeof str === 'string')</code></td></tr>
<tr><td style="padding: 4px 20px 0 0"><code>instanceof</code></td><td style="padding: 4px 20px 0 0">returns true if the class reference on the right, is anywhere in the ancestry of the object on the left</td>
<td style="padding: 4px 0 0 0"><code>if (obj instanceof Object)</code></td></tr>
</table>

### `for` loops and the `Array.forEach` Method
I'm going to be honest with you, dear students. I don't know a single one of the newfangled `for` loops, just what I call the "traditional `for` loop". It looks like this:
```js
for (let i = 0; i < something.length; i++) {
// looped code
}
```
As you can see in the parentheses above, the `for` statement has three arguments separated by semicolons:
- The first one happens when the loop is about to begin
- The second one is a conditional that determines whether the loop happens, or happens again
- The third one happens after each run of the loop
So in the example above:
1. A variable called `i` is declared and defined as `0`.
2. Then `i` is compared to something called `something.length`. Arrays have a `.length` property that contains the number of entries in that Array. Remember, Arrays start numbering their entries at 0; this is why we're checking for `i < something.length` (`i` *less than* `something.length`) instead of `i <= something.length` (`i` less than *or equal to* `something.length`).
3. Then the `// looped code` area happens (which presumably contains actual code instead of just a one-line comment).
4. `i++` happens, which adds 1 to the stored value of `i`.
So how does this control flow structure help you walk through an Array and address every element one by one? Because it gives you a variable (named `i`) that's going to loop every whole number from 0 to that Array's `.length - 1` That's perfect:
```js
// the next line creates an array
let something = ["truck", "train", "aeroplane"];
// as long as i is less than 3, keep looping
for (let i = 0; i < something.length; i++) {
// we're in the loop now
// something[i] is now an element of something
// output that element
console.log( something[i] );
}
```
But there's a shorter way that's great in most situations. As long as you don't need to `return` anything, you can:
```js
let something = ["truck", "train", "aeroplane"];
something.forEach( (item, i) => {
// looped code goes here
// item is the element of something
// i is the "index" of something
console.log( item );
});
```
As shown above, `Array.forEach` takes a callback as an argument. The callback will be called once for each element of `something`. Each time the callback is called, `item` and `i` will be pre-filled with the next element of `something` and the index of that element. (The "index" is the number you'd put between square brackets to get that element.)
### The Increment (`++`) and Decrement (`--`) Operators
You'll have noticed that the traditional `for` loop has `i++` as the third statement in its funky signature. This is the "Increment Operator". It adds 1 to the variable it's attached to, assuming it's a number. You can subtract 1 from a variable just as easily, which for example is how you'd do a `for` loop that counts backwards: `i--`.
### `while` Loops
Another situation you'll occasionally find yourself in that calls for the Increment Operator in a loop: you want a loop that runs until a condition is met. But you also want a limit to how many times the loop will run -- rather than strictly waiting for that condition to change. This is a job for the `while` loop.
```js
let isDone = false;
let i = 0;
while ( !isDone && i < 10000 ) {
isDone = checkStatus();
i++;
}
```
We know the `while` loop will run at least one iteration because `i` starts at 0 and `isDone` starts as `false`. Why does that mean at least one iteration? Because after `while` is a conditional that says: evaluate as `true` **if** `isDone` is `false` or evaluates to `false`, **and** `i` is less than 10,000. If the conditional evaluates as `true`, then the loop runs. After that loop, it checks the conditional again, and, if the conditional still evaluates to `true`, the script runs the loop again.
We got this result out of the `while` conditional thanks to some new things: the "Logical Not" operator, and the "Logical And" operator (plus we used the "Less Than" comparison operator, covered earlier this lesson). Logical Not inverts whether something will evaluate as true. Logical And allows you to chain together conditional logic; the condition on the left and the condition on the right must both evaluate as true in order for the conditional to evaluate true as a whole.
Inside the loop we get the return value of some function called `checkStatus()` which we can assume exists. Hopefully, whoever programmed the code above, checked the return value data type first, and confirmed it eventually outputs something that evaluates as true! We store the return value of `checkStatus` in the variable `isDone` which is the same variable checked in the `while` conditional. Then we increment `i`. Here the loop ends, with control flow now hitting the `while` conditional to see if it's still true. If it's false, control flow skips to the next line after the `while` loop's closing bracket. But if the `while` loop's conditional evaluates as `true` forever, the script will keep running that loop forever, or until someone or something shuts it down.

### Lesson Conclusion
Manipulating and navigating your data is the essence of programming. Every category of software must manipulate data, and to do that, often, a coder must navigate data structures. There are often situations such that, not only do you have a complex data structure, but you have an array *full* of those structures. Therefore, it's important to understand loops, and know which loop is best for which job. Remember, the traditional `for` loop might be slightly more cumbersome to write out, but it lets you `return` effectively. Today's lesson also unlocked the conditional part of `if` and `while`, by exposing the conditional operators. And not last but least, I explained what the `++` and `--` operators do.
How to Code: The Fundamentals, pt 0
By AstroMacGuffin dated Sat Aug 06 2022 15:16:25 GMT+0000 (Coordinated Universal Time) last updated Sat Aug 20 2022 17:52:38 GMT+0000 (Coordinated Universal Time) With parts 1 and 2 of this series already out, I now realize I skipped a few topics crucial to many students. Things like:
- how to run JavaScript code,
- how to find bugs in JavaScript code,
- what is Node.js,
- what's the difference between Node.js and JavaScript,
- what editor should I use to code in JavaScript,
- what is HTML,
- what is DOM,
- what is an NPM package,
- etc
This post is for beginners, and those whose experience mainly consists of jumping in too deep with not enough fundamental knowledge. Let's get you sorted on the bare beginnings of how to code in JavaScript.
Featured Article
How to Code: The Fundamentals, pt 2
By AstroMacGuffin dated Thu Aug 04 2022 19:22:18 GMT+0000 (Coordinated Universal Time) last updated Wed Aug 17 2022 11:22:33 GMT+0000 (Coordinated Universal Time) If you finished part 1 of this series and thought to yourself, "that wasn't enough for one lesson, I need more immediately!", then you're an odd one, because that was a lot of information. But here we go again! After a quick roundup of smaller topics we're going into objects, classes, and async/await (aka asynchronous code)!
### This Lesson
First a round-up of important topics that don't fit elsewhere: `null` and `undefined` as both data types and values; and Garbage Collection aka GC -- JavaScript's technique for memory management. Then I explain everything a beginner needs to know about asynchronous code aka `async`/`await`. Then we jump headfirst into objects and classes.
Until recently, programming meant writing lines of code in full confidence that, when you run that code, line 1 would finish before line 2 would begin. And, today, it's still mostly the same. But then a rookie slams headfirst into an asynchronous function. Today we're going to treat `async`/`await` as a fundamental.
It's also time to cover objects and classes. Object Oriented Programming is probably the single most powerful tool in rapid programming ever. You'll learn how to treat code like layers in an image, stacking them on top of each other to create an end result that can save a professional programmer hours per task.
### `null` and `undefined` Data Types
In programming there are multiple ways to say "nothing". The `null` and `undefined` data types correspond to the built-in `null` and `undefined` values. The value `null` is nothing special... it's just "nothing". Meanwhile `undefined` can mean the variable has been created, but hasn't yet been assigned a value. (Or, it can also mean someone deliberately set a variable to equal `undefined`.)
Both `null` and `undefined` evaluate to `false`. As a matter of style, I tend to set my variables to `undefined` when I need to signify they're in a "reset" state; and I tend to return `null` (or just `false` itself) from functions if some criteria wasn't met.
You can use the `typeof` operator to see `if (typeof someVariable === 'undefined')` but it's quicker to check the value: `if (someVariable === undefined)` loses both the `typeof` operator, and the quotes on `undefined`.
### Garbage Collection
Memory management is hard, and JavaScript is neither the best nor worst at it. Its primary means of keeping a trim footprint is called "garbage collection" or GC. The GC system relies on you, the programmer, to keep a clean house in your code.
Data disappears from your program, freeing up memory, when there are no more variables pointing to it. Remember from part 1 of this series: any data type that reports itself as an object (or an Array) gets variables that all point to a single instance of the data. It takes special techniques to ***copy*** an object or Array. If your code says `const whatever = someObject;` you now have one copy of someObject, referenced from two different variable names.
This matters because, someday, you'll be building indexes of data. You'll need to be able to clear individual entries from those indexes, to keep your programs memory-efficient.
### Async/await - Asynchronous Functions
Our most basic control flow pattern -- top line to bottom line, one line at a time -- is no longer guaranteed, thanks to modern programming features. Programs can now run functions asynchronously, which means functions can activate and do whatever, ***but your outer scope code doesn't wait for the function to finish before continuing with the next line of code.*** As a beginner, you need to understand this fundamental side of the language: the asynchronous side. Because, someday soon, you will do something like:
```js
let someVariable = someFunction( options );
```
...and everything will seem fine, but you won't receive any data in `someVariable`... or if you do have any data in someVariable, it's some object called a Promise. In this situation you should check the declaration of `someFunction` to see if it is `async`. An `async function`'s declaration looks like one of these:
```js
async function someFunction( options ) {
// code
}
// in the following forms, let or var may be used in place of const
const someFunction = async ( options ) => {
// code
}
// or
const someFunction = async function( options ) {
// code
}
// object classes have methods, which don't use the "function" keyword, but they're totally functions
async someMethod( options ) {
// code
}
// another way of declaring an object method
someMethod: async function ( options ) {
// code
}
// yet another way to declare an object method
someObject.someMethod = async ( options ) => {
// code
}}
// ...or...
someObject.someMethod = async function( options ) {
// code
}}
// etc... yes, there are still other ways...
```
#### Solution 1: `await` the `async`
If it's `async`, you should adjust the code where you call that function. Instead of
```js
let someVariable = someFunction( options );
```
...you add `await` before the function call, e.g....
```js
let someVariable = await someFunction( options );
```
**This won't solve every situation.** But in many cases, a quick `console.log()` will confirm you now have the data you expected, instead of a Promise. If it doesn't solve your situation, then you probably need to know about "Thenables" and Callbacks.
#### Solution 2: Callbacks: Functions as Function Input
A callback is a function you pass into another function as input. I don't mean like this:
```js
y.setHeight( x.getHeight() );
```
That's passing the function's *output* as the input of another function. I'm talking about passing the function *itself* as input. Remember, everything is a variable, even a function:
```js
y.setHeight( x.getHeight );
```
What's the difference? No parentheses on the function being inputted as a callback. Why do this? Storing the function gives you the ability to re-run the callback, giving you a fresh return value based on up-to-the-picosecond data.
There's also the anonymous callback. An anonymous function or anonymous callback is a nameless function made up on-the-fly. So yes, you can actually *write a function in the middle of calling another function.* That is a very common practice actually, and would look like this:
```js
aFunctionThatExpectsACallback( () => {
// code
} // end of callback
); // end of call to aFunctionThatExpectsACallback
```
Many asynchronous functions don't `await` properly and their programmers worked around this by accepting a callback. The callback is run when the job is done.
#### Solution 3: "Thenables" & Promises
Thenables are objects that have a `.then()` method which takes a callback as an argument. The callback happens when the Thenable finishes its other tasks. The standard JavaScript "Promise" object is a Thenable. So here is another way to force your code to wait until the Promise has turned into a value:
```js
// get the promise
let foo = await anAsyncFunction();
// now we must wait for the promise to resolve:
// method 1: declared function as callback
function someHandlerFunctionForWhenItsDone(data) {
// do stuff with data
}
foo.then( someHandlerFunctionForWhenItsDone );
// method 2: anonymous function as callback
foo.then( (data) => {
// do something with the "data" variable
});
```
As shown in "method 2" just above, the callback will usually have at least one parameter, which is your output data, automatically populated into the callback's input when the task is done. The spec for any given callback will also often have an error object as an input parameter; again, this is auto-filled when your callback starts to run.
#### In Conclusion (For Now) regarding Asynchronous Code
Asynchronous features are a good thing. They make interfaces faster. But as a beginner, they can seem like voodoo and a curse. Just remember there's always a way to get the result you want; the three techniques above will get you through basically all situations.

### Objects
If you're one of those students who started with hands-on tutorials before seeking to learn the basics, then you've probably used objects before. Anytime you see the dot notation such as `Array.isArray()` or `someString.split()` or `Object.keys()` that's either an object, or a class.
Sharp-eyed students may have noticed I included strings as objects! But in part 1, strings were one of the data types ***not*** counted as an object! On a certain level, everything is an object in JavaScript; the two categories of data types from lesson 1, the "primitives" vs "objects", still stands as the line between values being copied vs objects being referenced. Try not to think about it too hard.
Choose any real-world object in your line of sight. It has properties: it has at least one color, at least one shape, is it shiny or dull, is it powered, is it rechargeable, and so on. In programming, that's your most basic object. An object is a variable type. When used at this simplistic level, its equivalents in some other languages include the dictionary, or the hash, or the associative array. The most basic JavaScript object is just a variable that holds sub-variables. You can define one very easily on the fly, almost anywhere in your code:
```js
const ball = {
color: 'red',
bounciness: 1.0,
size: 'large',
};
```
Notice this is basically identical to JSON, the **J**ava**S**cript **O**bject **N**otation language.
This kind of object is very useful, but not very powerful. What if it could handle its own bounce command? Of course, it can:
```js
const ball = {
color: 'red',
bounciness: 1.0,
size: 'large',
isBouncing: false,
bounce: (milliseconds) => {
// bounce for a number of milliseconds
console.log('The ball starts bouncing.');
ball.isBouncing = true;
setTimeout( (obj) => {
console.log('The ball stops bouncing.');
obj.isBouncing = false;
}, milliseconds, ball);
},
};
// Set it off
ball.bounce(1000);
// Monitor status
console.log(ball.isBouncing);
setTimeout( () => {
console.log(ball.isBouncing);
}, 1500);
```
But what if you need your ball code to be reusable? You create a **class**. Then your code can say something like this:
```js
const zipper = new Ball( { color: 'red', bounciness: 1.0, size: 'large' } );
zipper.bounce(1000);
```
### Object Classes
A class is like a second data type, for objects. Writing class-based code unlocks new features in object-oriented programming, such as using `this` to mean "this instance of the class as an object".
Making object classes is easy:
```js
class Ball {
constructor(arg) {
this.color = arg.color;
this.bounciness = arg.bounciness;
this.size = arg.size;
}
bounce(milliseconds) {
// bounce for a number of milliseconds
console.log('The ball starts bouncing.');
this.isBouncing = true; // "this" instead of "ball"
setTimeout( (obj) => {
console.log('The ball stops bouncing.');
obj.isBouncing = false;
}, milliseconds, this); // "this" instead of "ball"
}
}
const zipper = new Ball({color: 'red', bounciness: 1.0, size: 'large'});
zipper.bounce(1000);
```
Important but dumb thing about terminology: A function that resides inside an object or object class, is called a "method". Methods are functions. Go ahead, do a `console.log(typeof zipper.bounce)` and see if it doesn't confirm - methods are functions. Almost everything that's true about methods is true about functions, and virtually everything I'll ever say about functions also applies to methods. They're the same thing (so why couldn't they have the same name?) ...
The *method* `constructor` runs whenever there's a `new Ball()`. The `constructor` method receives the arguments given to `new Ball()`. Here we have it configured for a single argument:
```js
class Ball {
constructor(arg) {
```
And when `new Ball()` is called, we create an object on the fly to serve as the single argument:
```js
const zipper = new Ball( {color: 'red', bounciness: 1.0, size: 'large'} );
```
#### Extending Classes
Remember the analogy about putting code on top of code, like layers in an image? This is where you do that. Consider if we rework the `Ball` class like so:
```js
class Toy {
constructor(arg) {
this.name = arg.name;
this.color = arg.color;
this.size = arg.size;
this.brand = arg.brand;
this.cost = arg.cost;
this.owner = arg.owner;
}
}
class Ball extends Toy {
constructor(arg) {
super(arg); // call the parent's constructor
this.bounciness = arg.bounciness;
}
bounce(milliseconds) {
// code
}
}
```
The `extends` keyword creates a parent/child relationship between two classes. The line `super(arg)` in the `constructor` for `Ball` refers to the `constructor` of `Toy`. In this relationship, `Toy` is known as the "parent class". The "child class" is `Ball`. The child class absorbs all the properties of the parent, including methods.
But that's not all. The new child class is also linked to the parent of the parent class, and the whole ancestry, leading back to a class that doesn't extend anything. Every property and method from that family line, gets absorbed into the child class.
Anytime the same method name appears in two or more classes in the family line, the child class overrides. The child class method can (and often should) call the parent class method, similarly to how the parent's constructor was called from the child's constructor:
```js
class Toy {
constructor() {
}
setColor(color) {
this.color = color;
console.log('The color ' + color + ' was saved.');
}
}
class Ball extends Toy {
constructor() {
super(); // this line is mandatory in child constructors
}
setColor(color) {
super.setColor(color);
console.log('The ball changed colors!');
}
}
```
`super.setColor()` calls the `setColor` method on the parent class. It's almost always a good idea to put the input from the child method, into the input for the parent method, as I've done in the example:
```js
setColor(color) {
super.setColor(color);
```

Now that we've swept through the most powerful features of objects and classes, let's wind this lesson down with two more class features that are often overlooked by rookie programmers. Both of them deal with the keyword `static` and how it modifies properties and methods.
#### Classes as Data Tables
When you normally give properties to a class, you do so by defining the properties in the class constructor. (Yes, you might declare or even define normal class properties above the constructor, but sometimes you will have more complex initialization for a property than what is allowed in that format, and why divide up your initialization between two parts of the code?) This makes it so the property is associated with an *instance* of that class, aka an object of that class. You can't use those properties until you create a new instance of the object:
```js
const zipper = new Ball( {color: 'red', bounciness: 1.0, size: 'large'} );
console.log(zipper.color);
```
But it's also possible to put data into a class in such a way that you don't need an object of that class to access those properties. These are called "static properties". Consider:
```js
class Toy {
static purpose = 'fun';
}
console.log(Toy.purpose);
```
This is a great place to put configuration flags, error messages, and so forth. Don't forget that these properties can be objects, so you might wind up with:
```js
class Toy {
static ERR = {
UBROKE: 'You broke it!',
NOTFUN: "You don't find it fun anymore.",
PENYWS: 'The toy fell into a sewer grate!'
};
}
// throw an error: we don't want to play with Pennywise
throw( Toy.ERR.PENYWS );
```
#### Classes as Function Libraries
The same trick works on methods. Functions that seem logically grouped within a class's overall concept, are excellent candidates for static methods in that class. Perhaps we had already written a `throw()` function before creating the `Ball` class.
```js
function throw(obj, thrower, target) {
console.log(thrower + " throws the " + obj + " to " + target + ".");
obj.owner = target;
}
```
It might make more sense for this to become an object method, depending on your project. But perhaps we want the code to be capable of throwing non-ball objects *in the manner of a ball*. So we move `throw` to the `Ball` class with just one tiny change:
```js
static throw(obj, thrower, target) {
console.log(thrower + " throws the " + obj.name + " to " + target + ".");
obj.owner = target;
}
```
#### When to Use `static` and When Not To
There's two simple guidelines about whether or not your method or property ought to be a static:
- Needs an Object: if the method needs to read from, or write to, live object properties, then the method *probably* shouldn't be static. (However, don't forget the example above for `Ball.throw`, where the object was passed in as an argument, making the code more powerful because it can operate on anything.) Same for properties: if a property describes a specific object, it shouldn't be static. There is no exception for properties. Static properties should describe **all** objects of the class. You wouldn't make `size` a static property of a Ball class, but you might make `shape` a static property equal to "round" (if you wanted to troll American football fans).
- Object More Convenient: Soon it will be common for you to encounter *objects full of objects* as you code. Normally each class goes in its own file called a module; to use a static class feature or make a new object of a class, you have to go back to the top of your file and `require` that class module. It's a minor hassle and totally avoidable if an object of that class is already conveniently available in your code's current context. In that case, common sense favors making the method or property *not* static.
### Lesson 2 Conclusion
I know we're going through these topics at breakneck speed. Pace yourself through each lesson as you see fit. I think coding is exciting, and I want these lessons to be here for people who want to binge this education.
Featured Article
How to Code: The Fundamentals, pt 1
By AstroMacGuffin dated Thu Aug 04 2022 11:24:00 GMT+0000 (Coordinated Universal Time) last updated Sat Aug 13 2022 12:12:45 GMT+0000 (Coordinated Universal Time) As moderator and volunteer on the JavaScript Mastery discord, I've noticed a trend. The people who are in the most distress when they come for help, are the people who jumped head-first into a tutorial that was far too advanced for their skill level. They don't even know the fundamentals of JavaScript and they're trying to build a TikTok clone or a medical-grade messaging app.
Some of them don't even want to learn, and are eager to say so.
For the rest of you: welcome back to basics. There's a lot of fundamental knowledge you may have missed. If you're not really sure what variables are; if you have no idea how to create a function; and if you've never heard of the terms "control flow" or "scope" before, everything you do will make more sense after you grok this information.
If someone (such as myself) sends you this link, congratulations! That person thinks you'll be a better programmer with just a little bit of high-density reading!
People who don't write code might think it's magic, but it's just language, and logic. Anyone can pick it up, because our species excels at both language and logic. So let's do this!
If you feel like I skipped some crucial information, maybe try [part 0 of "How to Code: Fundamentals"](https://astromacguffin.com/ref/id/62ee85c9ae620ee833fd88b7).
### This Lesson
First you'll learn about control flow and scope. Then you'll learn about variables, a little bit about data types, and then functions.
Control flow is a programming concept that means you are in control of which instructions get done in what order. In this lesson we'll mostly be focused on the simplest control flow scheme: line 1 happens, then line 2 happens, then line 3, etc. until the program is complete. I'll use the `if` statement to demonstrate a common control flow feature of programming.
Variables are nametags for pieces of data. There are many types of data. Variables are not "typed" in JavaScript, meaning a variable can point to data of one type one moment, and another type of data the next.
Functions are nametags for code, but they're also more. Functions take input and send output, and can be any level of complexity, making them entire mini-programs within your program.
### Control Flow
"Control flow" refers to things you can do in programming that control which instructions get sent to the CPU in what order. Take your simplest code sample, a traditional Hello World in browser-side JavaScript:
```js
const text = 'Hello World';
alert(text);
```
It has two lines of code:
1. The first line of code creates a `const` -- a "constant", which is a type of variable. The `const` named `text` will hold the text, "Hello World".
2. The second line of code calls a function that's built into JavaScript, `alert`. It passes input to that function by placing the variable name `text` between the parentheses.
`alert` is a well-known function that pops up a simple message box on the web browser. What should the message say? That's the input you provide when you call the `alert` function. More on functions later. The upshot for now is that, when you run this code, a pop-up, saying "Hello World", should appear.
But how does the `alert` function know anything about a variable named `text`? That's thanks to control flow, and scope, a second feature under your control, which will be explained soon. Suffice to say for now: control flow goes from top to bottom, line by line. Since the definition of `text` came before the call to `alert`, `text` existed when `alert` was called.
To explain scope better I'll introduce the `if` statement. This code contains a common mistake:
```js
let color = 'blue';
if (color === 'blue') {
const text = 'Hello World';
}
alert(text);
```
What's happening here? First, let me explain *operators*. A single `=` equals sign is known as the "assignment operator". It assigns a value on the right hand side, to a variable on the left. So on the first line of code above, a variable called `color` is being *assigned* the value "blue".
But on the next line of code, we have three equals signs `===` back to back. This is one of the many *comparison operators*. The `===` operator means "is exactly equal to".
And of course, on that second line of code above, we've met our first `if` statement. If the conditions in the parentheses evaluate to `true`, then the code in the curly braces will be executed. This is a control flow feature. If the code above was run with no modifications, the following line of code would always be executed because `color` will always be exactly equal to "blue" (since we just defined it as such in the line above):
```js
const text = 'Hello World';
```
But since that's all the code in the curly braces after the `if` conditional... what happens next? After any control flow structure in your code has met its end, control flow always resumes its previous state, meaning in this case, we go back to doing things line-by-line, top to bottom...
### Scope
...Which would be great if not for the bug. It's a very common bug: a variable is being used "out of scope".

Let's look at the whole thing again:
```js
let color = 'blue';
if (color === 'blue') {
const text = 'Hello World';
}
alert(text);
```
If you ran it in a browser, no pop-up box would appear, and you'd be told `Uncaught ReferenceError: text is not defined` in the Developer Tools console. (To open the console, right click almost anywhere in the page, and choose **Inspect** -- e.g. **Inspect element**.)
So why isn't `text` defined? It's because it fell out of scope. Basically, each set of curly braces creates a context one level "inner" compared to the context of where you typed those new curly braces. Using our example, the `const text = 'Hello World';` line is in a context one level "inner" vs everything outside those curly braces. **Each of these contexts has its own scope.**
Variables from "inner" levels of scope can't be used in "outer" levels of scope. Variables from "outer" levels of scope **can** be used in the "inner" scope code. Just remember, in any given situation, the so-called "outer scope" is often an "inner scope" compared to the overall global scope, that is, the outermost part of the control flow. ***The variable will fall out of scope when the block that created it, ends.*** So long as that doesn't happen before control flow reaches the part of the code where you want to use the variable -- the variable will be available.
In the example code, the `if` block ended with the closing curly brace `}` and so the `const text` no longer existed when `alert` was called. That's scope.
### Variables & Data Types
Variables (aka vars) are nametags for data. This alone is a powerful feature. Combining variables with other variables, and combining variables with functions, represents almost 100% of programming, so this section is critical.
Someone recently asked in the JavaScript Mastery discord why variables were important, so here's a bullet list of reasons off-the-cuff:
- Configuration (the easiest config system for any piece of software is a list of config vars at the top)
- Software Speed (when the same value is referenced multiple times, a variable is faster)
- Function Arguments (without which functions would be far less powerful)
- Readability (even if you're the sole maintainer of a program, you'll thank yourself later if your code is readable)
- Debugging Steps (easier to find the mistake in your code if that mistake leaves a named imprint you can output)
First thing you need to know is the three types of variable, identified by the keyword used to declare them: `const`, `let`, and `var`.
- `const` - The variable must be defined. Can't be changed. Normal scope rules apply.
- `let ` - The variable need not be defined. Can be changed. Normal scope rules apply.
- `var ` - The variable need not be defined. Can be changed. Special scope rules apply.
#### Declaring & Defining Variables
In JavaScript, as with most languages, you have to *declare* a variable before you can use it. You declare a variable by issuing one of the above three keywords, plus the variable's name.
```js
let foo;
var bar;
```
You can go one step further in the same line, *defining* the variable by using the assignment operator and some value on the right of that.
```js
let foo = 2;
var bar = 'The quick brown fox jumped over the lazy dog.';
```
Variables made with `const` must always be declared and defined at the same time.
```js
const foobar = 'Two quick brown foxes jumped over three lazy dogs.';
```
#### Why `var` is Useless
So what are these "special scope rules" attached to `var`? I'll borrow the example from [MDN](https://developer.mozilla.org/en-US/docs/Web/JavaScript/Reference/Statements/var):
```js
var x = 1;
if (x === 1) {
var x = 2;
console.log(x);
// expected output: 2
}
console.log(x);
// expected output: 2
```
The special scope rule is that `var` does nothing special. You still have to declare the variable in the outside scope, and even the second `var` in the `if` block (`var x = 2;`) offers no special features. Compare the above, to the below:
```js
let x = 1;
if (x === 1) {
x = 2;
console.log(x);
// expected output: 2
}
console.log(x);
// expected output: 2
```
They're practically identical (the second example is shorter by one keyword) and they get the same result. For this reason, JavaScript coders tend to drift toward *never* using `var`. Just remember: `const` for constants that can't be changed, `let` for everything else.
In all cases, you need to remember to declare your variables in proper scope, so that the variable will be available when it's needed, and released from memory when it's not needed anymore.
### Data Types
Variables in JavaScript both do, and don't, have a "type". Every piece of data has a "data type", and yet, variables are not "strongly typed" in JavaScript -- meaning any variable can point to any type of data -- no variable is locked into the type of data it was first assigned. Still, data types are important; eventually, you will find yourself often querying the data type of a variable as part of an `if` or `switch` statement, to make more powerful functions. Long story short, we need a quick word on data types.
For a beginner, here's what you need to know about types. There are two categories.
Category 1: "primitives"
- Data type `boolean` stores either `true` or `false`
- Data type `string` stores text of whatever length
- Data type `number` will be reported for every number you'll ever use
- `null` and `undefined` data types, explained in the next lesson
Category 2: "objects"
- variables created using the `let obj = new className()` syntax
- variables created using the `let obj = { field: 'value', property: 1 }` syntax
- arrays, regular expressions, etc
Why care? Because category 2, the objects, are always handled "by reference". This means if you assign it to another variable, both variables point to the same object, as shown here:
```js
let foo = { field: 'value', property: 1 };
// foo.property is currently 1
const bar = foo;
bar.property = 2;
console.log(foo.property); // output is 2
```
Only the object types do this.

### Functions
Functions give nametags to code, but also much more. Functions can take input, and can send output, like little mini-programs. Most of the best functions are small, single-task functions.
Let's take a look at a simple function that has both input and output:
```js
function add(a, b) {
return a + b;
}
```
The function is called `add` and it adds two numbers, that are given to it when it's called (the inputs). It adds the two numbers, returning (outputting) the result.
Let's break this down. Obviously `function add` creates a function called *add*. The `(a, b)` is where things get interesting. This is called the function's "signature". This is how you define the inputs for the function. In this example, we're defining two variables, `a` and `b`, that will be available inside the function. The values of `a` and `b` depend on whoever writes code "calling" this function. (You "call" a function by typing its name with a set of parentheses after it.) For example, if someone writes:
```js
let c = add(6, 18);
```
...then, inside the function, `a` will equal 6 and `b` will equal 18. Notice that the person calling the function used the same number of inputs as the signature specified.
And the last thing to understand about the function definition for `add`, is the line starting with `return`. The `return` statement is a function's output. If the function is used thusly: `let c = add(6, 18);` ...you might notice the `let c =` part and wonder, how does it know what `c` should equal? It knows because of the `return` statement inside the function. This example, our `add` function, doesn't even create a variable to return -- it just returns the direct result of a math operation. Outputting values of whatever complexity in this way is fine.

Let's look at a slightly more complex example. Let's say you have a simple project for logging and storing log entries.
```js
const ERR_LOGSTOR = 'Invalid storage medium'; // an error message
const logStorage = []; // an array where we store our logs
// function signature with a default value
function storeLog(logMessage='Message not specified') {
if (Array.isArray(logStorage)) {
logStorage.push(logMessage);
return 0;
}
else {
return ERR_LOGSTOR;
}
function logMessage(logMessage=undefined) {
if (logMessage === undefined) {
console.log('An undefined message was not logged');
}
else {
console.log(logMessage);
const status = storeLog(logMessage);
if (status === ERR_LOGSTOR) {
console.warn('Log storage error: ' + status);
}
}
}
logMessage('System started');
```
Let's break that down:
```js
const ERR_LOGSTOR = 'Invalid storage medium'; // an error message
```
Whenever you see two slashes `//` it means that the rest of that line is a "comment". This is how programmers put documentation into the code itself. Code can also be "commented out" by putting two slashes at the beginning of the line. Code that's been "commented out" is completely ignored when you run the program.
```js
const logStorage = []; // an array where we store our logs
```
Two square brackets `[]` means "create a new, empty array". So when we begin this program, `logStorage` will be assigned an empty array.
```js
function storeLog(logMessage='Message not specified') {
```
This is the function declaration and the beginning of its definition. The signature is one value this time, but the value has a default. Since the value has a default, you can skip that part of the signature when calling the function: it could be `storeLog('I am a log message')` or it could be `storeLog()` with nothing between the parentheses. If nothing is between the parentheses, the function will proceed as if you had typed `storeLog('Message not specified')`.
```js
if (Array.isArray(logStorage)) {
logStorage.push(logMessage);
return 0;
}
else {
return ERR_LOGSTOR;
}
```
In the above snippet, first we do a sanity check -- meaning we check the code's situation to avoid producing an error. In this case, that means making sure the `logStorage` variable is an Array. If it is, we add the `logMessage` to the end of the `logStorage` array and output a 0 as our function's return value. If `logStorage` is not an Array, we do nothing except return the error message defined at the top of the script.
A quick additional note about `return`: using `return` also exits control flow from the function, in addition to sending output. Notice you can have multiple `return` statements in a function. Control flow will only arrive at one of them, but you can manage this with features like the `if` statement.
```js
}
```
This ends the function. Every code block begins with `{` and ends with `}`. This applies to control flow structures such as the `if` statement, as well as functions, classes, etc.
```js
function logMessage(logMessage=undefined) {
```
Once again we have a function declaration with a single parameter as its signature, and once again the parameter has a default value.
```js
if (logMessage === undefined) {
console.log('An undefined message was not logged');
}
```
Here we're doing some error trapping: we don't want to log nothing, but we do want to log the fact that nothing was logged. (Ah, business logic.)
```js
else {
console.log(logMessage);
```
Whenever you use `if`, you can use `else` right after the `if` block ends. The `if` block executes if the condition in parentheses is true; the `else` block runs otherwise.
```js
const status = storeLog(logMessage);
```
Here we're using the previous function, `storeLog`. Yes, you can use functions within functions. If doing task A means also doing task B, you'll probably find yourself calling one function from within another.
```js
if (status === ERR_LOGSTOR) {
console.warn('Log storage error: ' + status);
}
```
When we ran the `storeLog` function we also grabbed its return value. Now we're checking it against our known error messages, and if there was a match, we're warning the console operator there was a problem.
```js
}
}
```
Here we're closing the `else` case and closing the function.
```js
logMessage('System started');
```
Finally we set off the whole chain of events by calling `logMessage` to log a message that the system has started.
Move on when you're ready to [part 2 of "How to Code: The Fundamentals"](https://astromacguffin.com/ref/id/62ec1c6a209885383e63d857).


